Raw Chocolate Hazelnut Truffles

The problem with working from home is that the kitchen is a powerful distraction.

Oftentimes I’ll be typing away, working on an assignment, fielding email, or straightening up notes from an interview or field trip, and a wonderfully seductive thought will pop into my head.

“Should I start slicing zucchini for roasting tonight?”
Or: “How about I spatchcock a chicken and try a new marinade for it?”
Or maybe: “Will the apples that the neighbor’s daughter brought from her garden keep for much longer, or should I hurry up and make Gâteau de Mamy?”
And also: “Boy, do I wish I had some raw chocolate truffles to nibble on!”

It’s all I can do not to jump up from my chair and dash into the kitchen; I call it culinary procrastination.

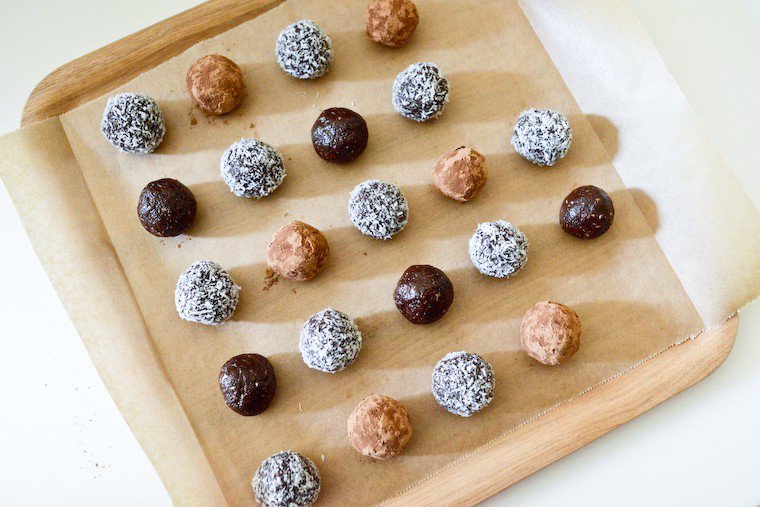
Channel your inner kindergartener and roll little balls of chocolate dough between your palms. The result is absolutely delicious, with a vibrant chocolate flavor and a rich, lightly nubby texture from the nuts.

Regarding the truffles, the idea came about as I was writing a story on raw chocolate for my column in ELLE à table. “Raw” chocolate is chocolate that is processed at low enough a temperature to preserve a maximum of antioxydants and minerals. The concept is disputed, especially in the absence of any certification system — I recommend you read Stephanie Zonis’ in-depth article on the subject. But since raw cacao powder is easily available, and can be used to make all sorts of interesting, raw-inspired preparations with alternative sweeteners and high flavor, I’m totally on board.

As one might expect, it’s hard to research the topic without wanting to get all practical, and within minutes I had abandoned my computer and was happily whizzing and shaping and dusting these two-bite treats.

The good news is (for my editor at least) it didn’t keep me away from my desk for very long, as this is a super easy and quick process. First, you’ll grind some nuts. I used hazelnuts and sunflower seeds here, but you could substitute whichever nuts you prefer (think almonds, walnuts, macadamia, pecans…), and I like a combo. Then, you’ll process some pitted dates with salt, spices (I use the cinnamon I love and/or freshly ground cardamom), and raw cocoa powder. Finally, you’ll pour in some gently melted coconut oil and honey (rice syrup for you vegans) to bind everything together.

Raw Chocolate Truffles

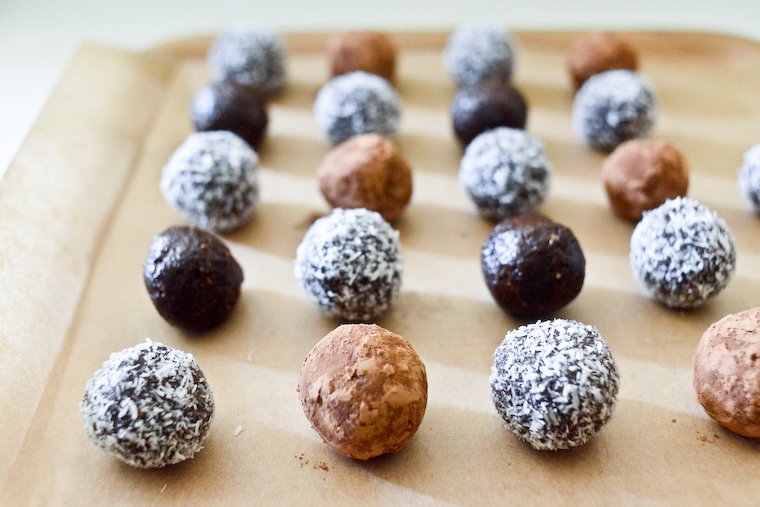
All that’s left to do then is to channel your inner kindergartener and roll little balls of dough between your palms, then toss in a bowl of grated coconut or cocoa powder to coat. The result is pretty and appetizing, and more important, it is absolutely delicious, with a vibrant chocolate flavor and a rich, lightly nubby texture from the nuts.

Such a welcome pick-me-up in the middle of a work project, and the purrrfect treat to savor while watching your favorite series at night when the kids are in bed.

I want to know!

Do you eat raw chocolate yourself, and what’s your favorite brand? Have you ever made your own raw chocolate confections? Does the kitchen ever draw you away from what you should really be doing, you culinary procrastinator you?

I hope you try making these truffles, and when you do, please share the pictures on social media using the hashtag #cnz.

[sc:cinnamon_note]

Continue reading »

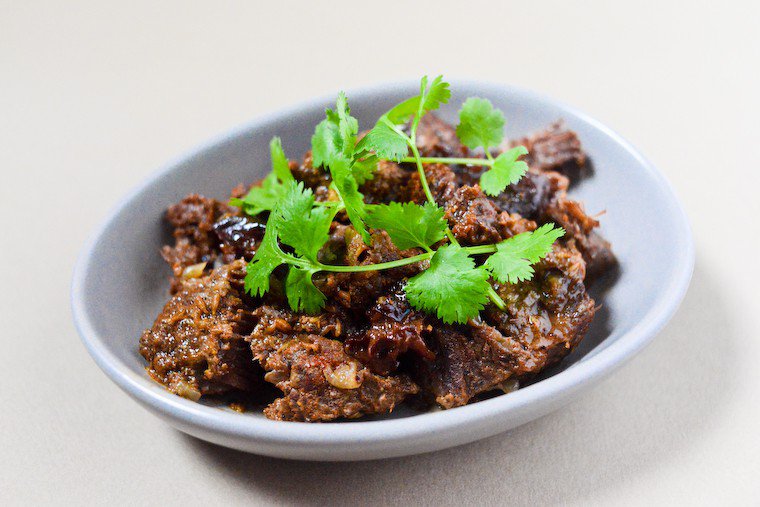
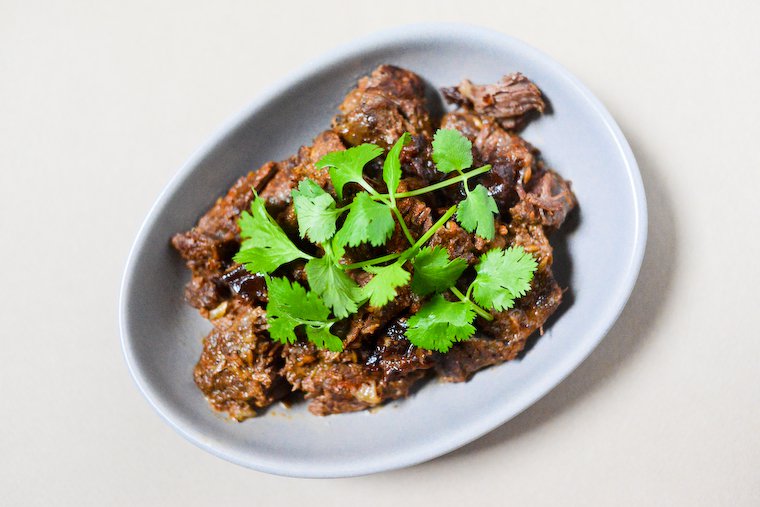
Spiced Beef Cheek Stew

I am not sure why I thought buying beef cheeks in mid-July was a good idea.

It was a crime of opportunity, really: I was returning to the farmers’ market at the Batignolles for the first time in a while (having a second baby will do that to you) and I was eager to pick up organic meat from one of the farmers there, not quite knowing when I’d have a chance to go again.

Fresh organic meat is still inexplicably hard to find in Paris, as most butchers — even the fancy, pricy ones — offer conventional meat only. It may be well raised and from smaller farms, though it’s always hard to know for sure, but the organic certification is never a selling point.

I stopped by one of my favorite meat stalls at the greenmarket, one run by a boisterous butcher lady who comes with her young apprentice and her teenaged daughter. I spotted a beef cheek in the display case, and set my heart on it immediately: it’s one of my favorite cuts for braised dishes, but it’s a little-known one that you usually have to special-order. It’s also fairly cheap, compared to other stew-friendly cuts, but it has lots of flavor and a rich, satisfying texture brought on by the high collagen content.

Beef cheek is fairly cheap, compared to other stew-friendly cuts, but it has lots of flavor and a rich, satisfying texture brought on by the high collagen content.

The butcher said, “Do you want the entire cheek?” and I said, “Sure!” not having any notion of how big that would be. I watched her trim and prepare the whole thing, and ended up with a good four pounds of meat.

A great purchase by any cook’s standard, except… we were in the middle of a heatwave and the last thing anyone wanted to eat was braised beef cheeks. Thankfully, I was able to find room in my tiny freezer to stash the package away, and dutifully updated the list I maintain to keep track of my frozen supplies so things don’t camp in there for a decade. (Do you do the same? I recommend it.)

Fast forward a few weeks, and I was patting myself on the back for such accidental preparedness. In the midst of the hectic, my-eldest-is-starting-school, my-youngest-is-starting-daycare, I-have-a-zillion-projects-I-want-to-work-on weeks, I was able to put together this incredibly aromatic, soul-warming spiced stew in a matter of minutes.

I use a pressure cooker for this recipe, which saves a significant amount of time and means the stew is ready in — wait for it — an hour. You can, however, prepare it in a Dutch oven or a slow cooker: the active time is just as short, but the meat will take longer to cook. And in all cases, I recommend you prepare it the day before; all stews benefit from a good night’s sleep.

The amounts listed serve a gang — a gang of eight, to be precise — which makes it perfect for a fall dinner party, or means a family can get two to three dinners out of it. If you’re the kind of person who dislikes eating the same thing two days in a row, you can transform the dish on subsequent nights: shred the meat with two forks and toss it with pasta and freshly grated cheese, or layer it across the bottom of a baking dish, top with mashed broccoli and breadcrumbs, and place under the broiler of the oven to make a green hachis parmentier.

And of course, leftover servings may be frozen for another pat-on-the-back dinner down the road.

Join the conversation!

Have you ever cooked with beef cheeks? Is there another semi-obscure cut of meat that you love? Is it stew season yet where you live?

PS : Perfect mashed potatoes to serve with this, and a lovely plum tart to finish.

Spiced Beef Cheek Stew

Continue reading »

Easy Tarte Tatin

I realize this puts me in the minority, but I am someone who longs for fall, and the new crop of apples that comes with it.

Returning to the Batignolles farmers market after our vacation, I was elated to spot crates of bright red Akane apples — the first to appear in late August — and promptly filled a bag with them, my mouth watering at the thought of the crisp, acidulated wedges I would soon sprinkle with cinnamon and use to scoop up my lightly salted, crunchy almond butter.

But these apples are pretty good for baking, too, and on the first of the chillier, windy days that followed the altogether wonderfully warm summer we’ve had this year, I decided to call upon the comfort of a simple tarte tatin.

Beyond a good, tasty crust that’s both tender and crumbly, a winning tart tatin starts with a nice layer of buttery salted caramel.

I’m sure some cooks feel intimidated by the idea of this dessert but truly, there is no need to be. I would argue that it is, in fact, the most forgiving of tarts: the dough can be patched up as necessary if you can’t quite roll it out in one go — since the fruit bakes underneath it, you don’t have to worry about it being leak-proof — and there is no risk of it turning soggy since it is directly exposed to the heat of the oven.

Beyond a good, tasty crust that’s both tender and crumbly, a winning tart tatin starts with a nice layer of buttery caramel on which to arrange the apples at the bottom of the pan. This is easily done as well, if you trust your eyes and your nose to alert you to its doneness (the goal is golden brown and irresistibly nutty). I then sprinkle that layer of caramel with some salt, because well, what’s buttered caramel without salt?

I also peel the apples in alternating stripes, not just because it’s half the work (though it is) but because I think it’s pretty and I like a bit of skin on my cooked apples.

Perhaps the last step that needs demystifying is the flipping of the finished tart, in order for the crust to return to the bottom and the apples to the top. I admit this is a manoeuvre not to be taken lightly, but an assertive gesture and a good pair of oven mitts will do the job quite nicely. I actually enjoy the thrill of it — will it flip, will it stick? oh, the sense of adventure! — and feel safe knowing that any stubborn apple wedge that might remain stuck to the pan can be scraped off carefully and returned to its rightful place with no lasting consequence.

Some people like their tart tatin at room temperature, others prefer it slightly warm. You can still bake the tart earlier in the day then; you’ll just warm it back up in a low oven. As for accompaniments, I am partial to crème fraîche or thick yogurt, but I won’t begrudge you a scoop of vanilla ice cream if you promise it isn’t the artificially-flavored, tooth-achingly sweet kind.

Join the conversation!

How does tarte tatin rate on your favorite fall desserts list? Have you ever tried baking one yourself, and how did that go?

Tarte Tatin

Continue reading »

A Better Way to Slice Zucchini

Have you ever noticed how cutting the same vegetable in different ways has a significant effect on the flavor and overall eating experience?

I’ve written about grated carrots in this regard, and have recently adopted a new way of slicing zucchini that I wanted to share with you.

It all started with a plate of fish I had at Le Bal Café, one of my favorite lunch spots in Paris. This delicious dish came with thickish slices of zucchini, cut at a steep angle and roasted. I was instantly taken with this shape, which I thought was quite attractive, and very successful in terms of texture.

I played around with the idea in my own kitchen, and ended up with a slightly different technique, in which you work your way down the zucchini from side to side, as shown on this animated image:

How to Slice Zucchini

The slices are just as steeply angled, but have one skinless edge to them. Not only does it look lovely in the plate, but it makes for a great textural balance in every bite, from the firm, skin-side rim to the soft flesh in the middle.

It works particularly well if you’re going to roast the zucchini — my cooking method of choice these days, with a healthy glug of olive oil and a good coating of garam masala –, and it is quite fun to do, too, especially if your knife is well-sharpened.

So if you’re stuck in a rut with your same old zucchini half-moons, I hope you give it a try!

Join the conversation!

Do you share my interest in knife technique, and how different cutting styles produce different results? Do you have a favorite vegetable-slicing trick to share?

How to Slice Zucchini

Spatchcocked Chicken “Under a Brick”

Sometimes you come across a disruptive recipe and your life changes forever. This is one such recipe.

It was recommended to me by a reader named Saudia, from Oregon, who answered my call for recipe suggestions to use my brand-new Lodge pan, a US-made cast-iron skillet that goes elegantly from stove to oven. I’d been coveting one for a long time without ever having room in my luggage to bring it back from my travels, but early this summer, I finally found out it was available in Europe.

Saudia pointed me to the recipe Mark Bittman had published in the New York Times in 1997 (so, yeah, nothing new), and when I went on a search for images of the finished results, I stumbled upon this more recent post by my friend Adam, who had merged Bittman’s recipe with Amanda Hesser’s. I mostly followed the instructions outlined by Adam, with a few minor modifications.

First, you spatchcock* your chicken, which sounds a lot more intimidating than it really is: all you need to do is cut the chicken on either side of the backbone — I use kitchen shears — then flip the chicken and press it down firmly so it lies flat. This allows the chicken to cook faster and more evenly. Here’s how you do it:

I’d done spatchcocking once before, inspired by an old Gwyneth Paltrow video, of all things, but the chicken had turned out pretty dry so I’d gone back to my standard recipes for whole chicken: Muriel’s chicken or, with a bit more time on my hands, salt-crusted chicken or chicken in a bread crust.

But this recipe introduces a clever trick: you start by placing the chicken, skin side down, in a hot and oiled skillet, and you use a weight of some kind — the traditional recipe uses a brick, hence the name of the recipe — to press it down into the pan so the skin will brown nicely. The whole thing is then transfered to a very hot oven, where the chicken will roast for 15 minutes with the weight still on, and 15 more minutes skin side up and weight off.

This creates a marvellously colored chicken with a crisp, crackly skin; perfectly cooked everything (including the breasts, which don’t dry out); and lots of delicious, garlic-infused cooking juices that drip into the skillet under the chicken and stay there without burning or evaporating. And all this in a mere 35 minutes! We’ve been so finger-licking impressed that the rôtisseries in our neighborhood might not see us quite so often.

For optimal flavor, the recipe also has you rub the chicken with olive oil, salt, dried herbs, and cumin (my own addition), and you should do this a little bit in advance, to allow the seasoning to be absorbed fully. For convenience, I like to spatchcock and rub the chicken the day before, and then keep it in the fridge until I’m ready to cook it the next day.

In terms of equipment, you do need a cast iron skillet — or any heavy skillet — that’s ovenproof, and large enough to fit your spatchcocked chicken. I use this 26-cm (10-inch) Lodge pan and a standard French chicken fits in nice and snug. You also need something to use as the weight: if you’re the kind of person who has ready access to loose bricks you’ll wrap one in foil, but failing that you can use a second cast-iron skillet or the lid of a Dutch oven. I use the lid from this adorable cocotte.

Join the conversation!

Have you ever spatchcocked a chicken? How did you cook it and how did you like the results?

* In French, a spatchcocked chicken is called by the cute term poulet en crapaudine, because the chicken is made to look a little bit like a toad, or crapaud. Croak, croak!

Spatchcocked Chicken

Continue reading »

Get the newsletter

Receive FREE email updates with all the latest recipes, plus exclusive inspiration and Paris tips. You can also choose to be notified when a new post is published.

View the latest edition of the newsletter.