It all started with a store-bought dessert that we tasted at a friend’s house late last summer, which consisted in a light vanilla mousse garnished with raspberries and sandwiched between two layers of a thin, crisp, and lightly chewy almond cake. Everybody loved it, and I thought, hey, I think I could make something like that, too.
You see, years and years ago, at a Demarle homesale hosted by my friend Pascale, I acquired a silicon sheet pan and a rectangular pastry ring that formed a nifty kit to make exactly that sort of dessert, usually referred to as un entremets.
It was perhaps a little risky to experiment on the Christmas lunch crowd, but I have a very forgiving family.
Of course, the embarrassing question is, how many times did I use this kit in the first 4 1/2 years it was in my possession? And yes, you’ve guessed it: exactly zero. It’s hard to explain why — I’m sure you have a million examples of your own — but I always felt sure that it would one day come in handy.
And indeed, it did: when my mother and I discussed the Christmas lunch menu and I offered to bring dessert, it is the afore-mentioned raspberry entremets that popped in my mind — only I would be making it myself. Considering I had never made anything of the sort and my oven is a dysfunctional imp, it was perhaps a little risky to experiment on such an occasion, but I have a very forgiving family and I knew that, if things went horribly wrong, I wouldn’t be teased about it for much more than seven or eight years.
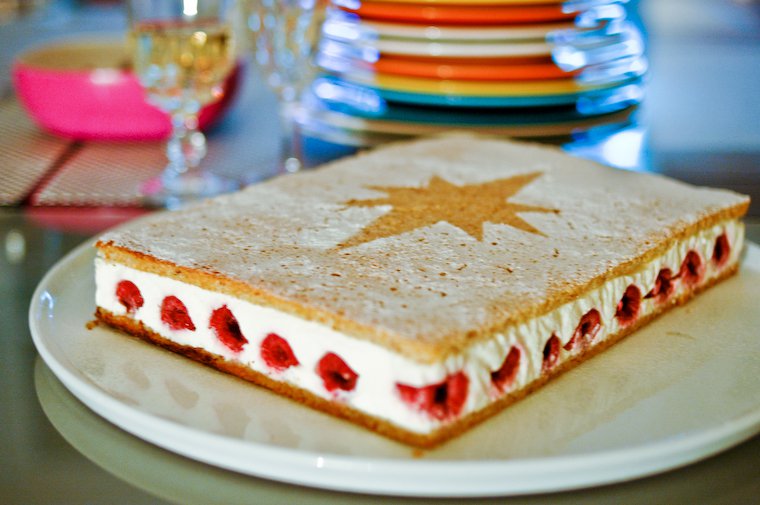
After some research, I decided that the easiest would be to have the cake component be a dacquoise, a classic preparation of beaten egg whites and ground almonds and/or hazelnuts, often used in such entremets to produce a light and chewy consistency. The mousse would be two-thirds lightly sweetened fromage blanc (a sort of thick yogurt) to one-third whipped cream, and the raspberries would be, it being December and all, frozen.
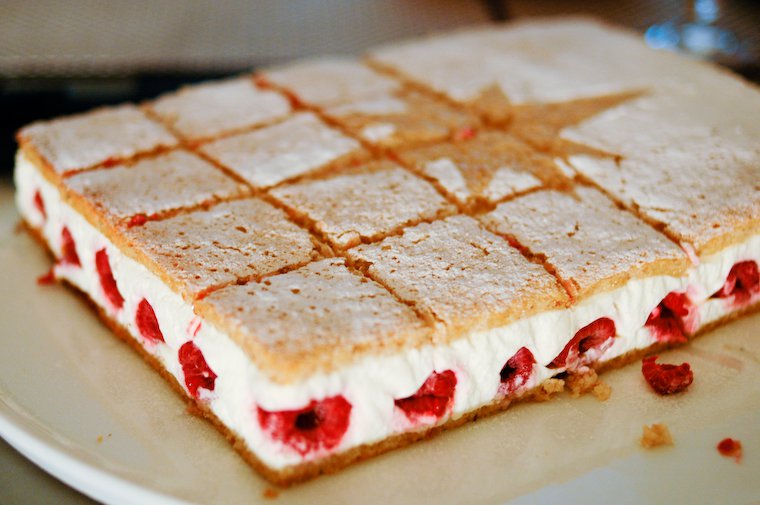
And to make the dessert unequivocally Christmassy without the aid of meringue mushrooms or plastic dwarves, I would dust the top of the entremets with confectioner’s sugar over a Christmas tree stencil drawn on light cardboard. Crafty, I know.
So I got to work, baking the dacquoise the day before and assembling the entremets on the morning of, my hands trembling a bit, but things went along surprisingly smoothly; I even breathed freely enough to hum every now and then. The bonus challenge was to bring the entremets to my parents’ without wrecking it, so I improvized a (classy) cake carrier out of a pizza box, and well, it got the job done.
Things went along surprisingly smoothly; I even breathed freely enough to hum every now and then.
After we took a break to exchange gifts — our nine-months-old nephew falling head over heels for the pink cow puppet we had gotten him — it was finally time for me to bring the raspberry dacquoise to the table.
To say that it was well received would be something of an understatement. My family is ordinarily very appreciative of what I make — I was kidding a few paragraphs earlier –, but I don’t recall ever eliciting such enthusiastic praise, which I was quick to divert, before my cheeks turned the color of raspberries, towards the original dessert and the equipment I’d used.
To be honest, I, too, was impressed with the result, especially in light of its relative ease of preparation, and I decided to bake an encore for the New Year’s Eve party we were throwing a few days later; it seemed wise to make it again while the process was fresh in my mind and hands.
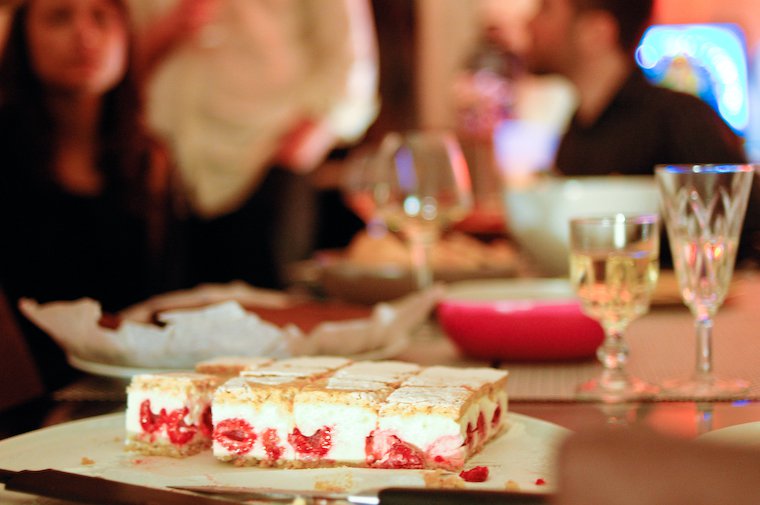
The second one, decorated this time with a star, turned out even better than the first — except for a slight mishap with my maddening oven, which browned one edge of the dacquoise a little darker than I asked — and it made an equally gratifying impression on those who ate it, some time after midnight on the first morning of 2009.

Have you tried this? Share your pics on Instagram!
Please tag your pictures with #cnzrecipes. I'll share my favorites!
Ingredients
- 50 grams (1/2 cup) finely ground hazelnuts (see note)
- 50 grams (1/2 cup) almond flour (= almond meal or finely ground almonds)
- 100 grams (3/4 cup) confectioner's sugar
- 4 egg whites (120 grams or 4 1/2 ounces total)
- 1 pinch salt
- 30 grams (2 1/2 tablespoons) sugar (I use blond raw sugar)
- 400 ml (1 2/3 cup) fromage blanc, or Greek-style yogurt, or quark
- 25 grams (2 tablespoons) sugar (I use blond raw sugar)
- 1 teaspoon natural vanilla extract
- 4 sheets gelatin (7.5 grams or 1/4 ounce total, see note)
- 200 ml (3/4 cup plus 1 tablespoon) whipping cream
- 300 grams (2 1/3 cups) raspberries (if frozen, don't thaw them)
- Confectioner's sugar
- A stencil shape drawn on and cut out from light cardboard (a star, a snowflake, a flower, a heart, a Christmas tree, you get the idea)
Instructions
- Preheat the oven to 180° C (350° F) and line a quarter-size sheet pan with parchment paper. I use a flexipat silicon sheet pan that's 24.5 x 34.5 cm (9 2/3 by 13 1/2 inches) and is 1-cm (3/8-inch) deep; it doesn't need lining.
- In a medium mixing bowl, combine the ground hazelnuts and almond flour with the confectioner's sugar.
- In another, spotless and grease-free bowl, put the egg whites and the pinch of salt. Using an electric whisk, beat the egg whites, at moderate speed first, then faster, until they form soft peaks. Add the 30 grams sugar and whisk for a few seconds more, until the egg whites are glossy.
- Stir a third of the egg whites into the hazelnut mixture to loosen it. Add another third of the egg whites and fold it into the mixture, working gently with a spatula to avoid deflating the egg whites. Repeat with the remaining egg whites.
- Pour the batter into the prepared sheet pan, level the surface with the spatula, and bake for 15 to 20 minutes, until the surface is dry to the touch and golden. Let cool completely in the pan. Cover with a clean dishcloth and keep somewhere cool and dry.
- (If you used the silicon sheet pan, flip it cautiously onto the dishcloth and gently peel the silicon pan back from the dacquoise, starting from the corners. Place a sheet of parchment paper onto the dacquoise, flip the dacquoise again onto a rack or a tray, and cover with the dishcloth.)
- Place the fromage blanc in a fine-mesh sieve to drain in the fridge for an hour. Place a medium mixing bowl and the whisk of your electric whisk in the fridge as well.
- In the meantime, cut the dacquoise into two equal rectangles so they'll fit into a 24 x 17 cm (9 1/2 by 6 2/3 inch) rectangular pastry ring, or the ring/pan of your choice. You'll note that the dacquoise is dry to the touch on one side (the side that was exposed to air during the baking) and slightly sticky on the other (the side that was touching the pan during the baking).
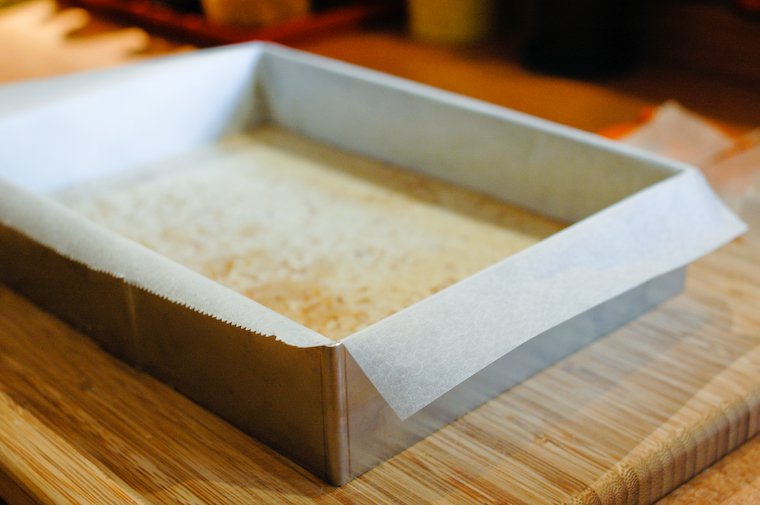
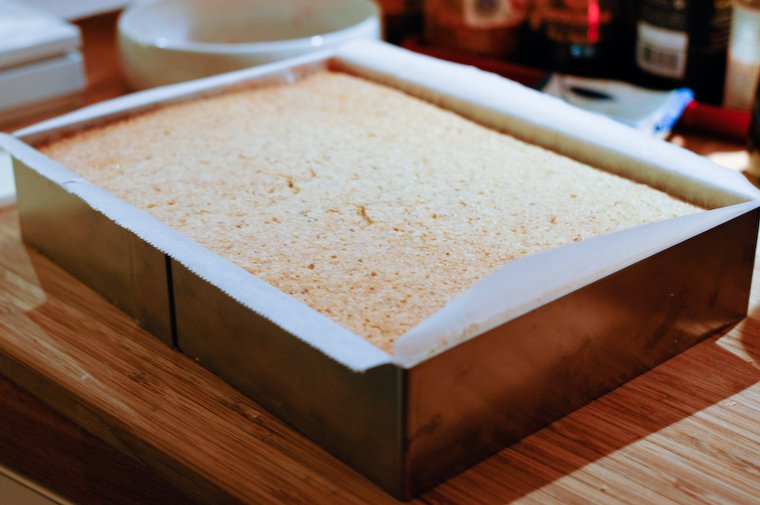
- Place one of the dacquoise rectangles, sticky side up, on a piece of parchment paper that's larger by at least 7 cm (3 inches) on all sides, placed on a cutting board or serving dish. Adjust the pastry ring over the dacquoise rectangle, cut out squares in each corner outside the ring so the parchment paper will form the shape of a cross, and slip the flaps inside the ring to line the sides neatly. Set aside. (Instead of parchment paper, some people also line the sides of their pastry rings with a clear plastic named rhodoid, but I am weary of letting PVC touch my food, so I don't use it.)
- Once the fromage blanc is thickened, place it in a medium mixing bowl and beat it with the sugar and vanilla.
- Put the sheet gelatin in a bowl of cold water to soften. Set 1 tablespoon whipping cream aside in a small saucepan.
- Take the mixing bowl and the whisk that you'd set in the fridge to cool, and use them to whip the remaining cream until stiff.
- Heat the reserved tablespoon of cream over gentle heat. When it is just under a simmer, remove it from heat. Squeeze the sheet gelatin in your hands to drain, add to the cream, and stir to dissolve. Pour into the fromage blanc mixture and whisk to incorporate.
- Fold the whipped cream into the fromage blanc.
- Pour a generous third of the filling into the prepared pastry ring, making sure you fill the corners well.
- Top with the raspberries: align them harmoniously all around and up against the sides of the ring first, so they'll be visible when the entremets is unmolded; arrange the others in a single layer in the middle.
- Top with the rest of the fromage blanc mixture, again making sure to fill the corners. Level the surface with a spatula.
- Top with the second dacquoise rectangle, sticky side down, and press gently so it adheres well.
- Place in the refrigerator to set for at least 3 hours, ideally 6 to 8, and no more than 10 (after that, the dacquoise will begin to turn soggy).
- Thirty minutes before serving, remove the entremets from the fridge and slide it onto a serving dish. Lift the ring to remove it. Peel the flaps of parchment paper delicately from the sides, cut them off with the tip of a sharp knife, and discard.
- Place the stencil on top of the cake, dust with confectioner's sugar through a fine-mesh sieve, and remove the stencil. Serve 30 minutes after removing from the fridge.
Notes
- The recipe below seems long, but that's only because I've described the different steps in some detail; none of them require particularly elaborate skills (I should know).
- I created the recipe for the specific equipment I have (quarter-size sheet pan and eighth-size rectangular pastry ring). Finding similar tools may require a trip to a professional pastry supply store; short of that, you can use other pans and rings, but the recipe may need adjustment or scaling.
- If you're unable to find ground hazelnuts, you can make your own. Combine a scant 1/2 cup (50g) hazelnuts with half of the confectioner's sugar in the bowl of a blender or mini-chopper, and process in short pulses until reduced to a fine powder.
- Sheet gelatin is easier to use, and has a more reliable gelling effect than powdered gelatin, so this is what I recommend. Outside of France, where it is available in any supermaket, it can be found at baking supplies stores, or ordered online.


