[Baguettes au levain]
When I started to bake bread on a weekly basis, I thought following a baguette recipe was out-of-reach territory: I would bake the kind of loaves I love — a hearty crust (but not too dark at the bottom), an open crumb (but one that’s still tight enough to withstand a good spread of dairy or almond butter), great flavor from a slow fermentation, and a nutritious blend of organic flours — but I would always go and get my Piccola baguette from the Coquelicot bakery on place des Abbesses.
After a while though, having baked enough boules (round loaves) in a closed vessel (a pyrex cocotte in my case) to become really good friends with my starter, I decided to graduate to baking bread on a stone.
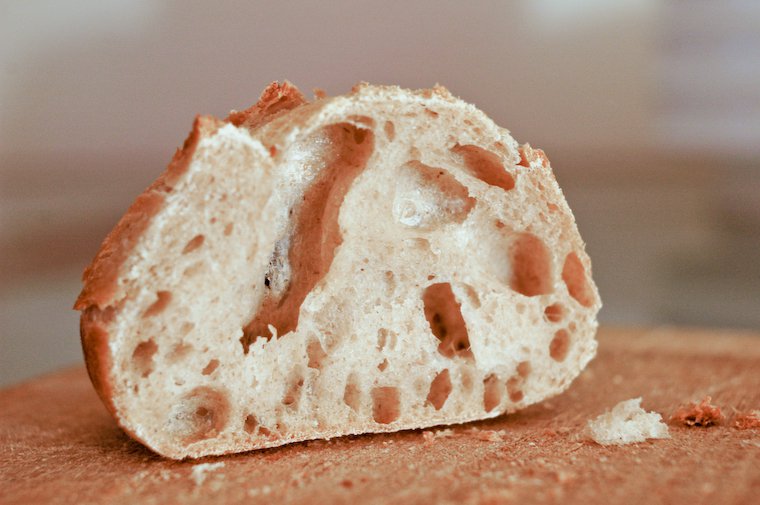
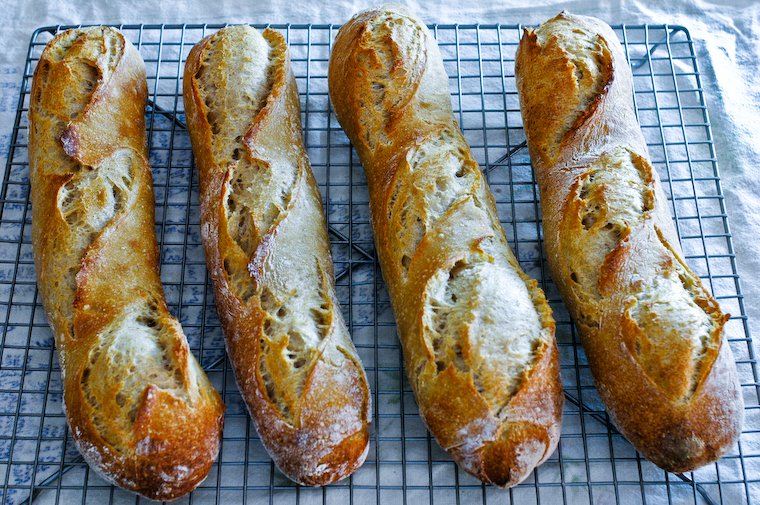
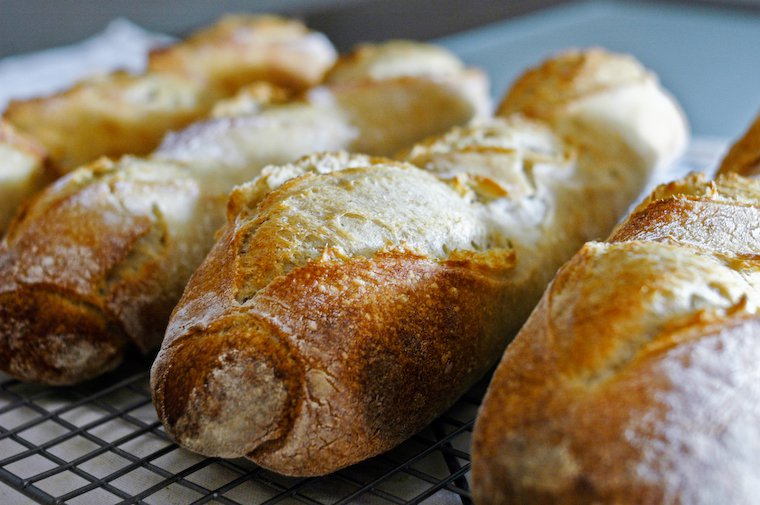
From the very first attempt, the result was squeal-worthy: a good oven spring, crunchy tips and crust, a crumb that feels springy and alive and, more important, a fragrant and flavorful bread.
A baking stone is fantastic for bread-baking: it absorbs heat as the oven preheats and retains it even as you open and close the oven door, which prevents the temperature in the oven from dropping dramatically when you put in the loaves. Additionally, bread dough that is plopped on a very hot surface rises beautifully: instead of spreading out first, then rising up, it seems a lot more motivated to rise upward from the moment it hits the blazing hot stone (I would too).
My first loaves on the baking stone were free-form bâtards — elongated oval loaves — because it was easier to fit two of those on my square baking stone, and I noticed that the crumb was more open than what I got when baking boules. I made a few more of those, and then I thought, what are baguettes if not thin bâtards? And why didn’t I just make baguettes?
Perfecting the baguette recipe
The baguettes one buys in French bakeries are rarely leavened with a natural starter, and when they are (baguette au levain), the starter is generally coupled with commercial yeast (it is worth asking). The flour that is used is a white wheat flour that often contains additives, and both of these characteristics account for their particularly light, aerated crumb.
What I wanted, on the other hand, was a baguette leavened with a natural sourdough starter only, made with a blend of organic flours that included some partially whole wheat, so I knew I wouldn’t get quite the same texture, but it would be a baguette in its own right.
After reading the reports of fellow starter enthusiasts for tips, and watching a few shaping videos, I felt about ready.
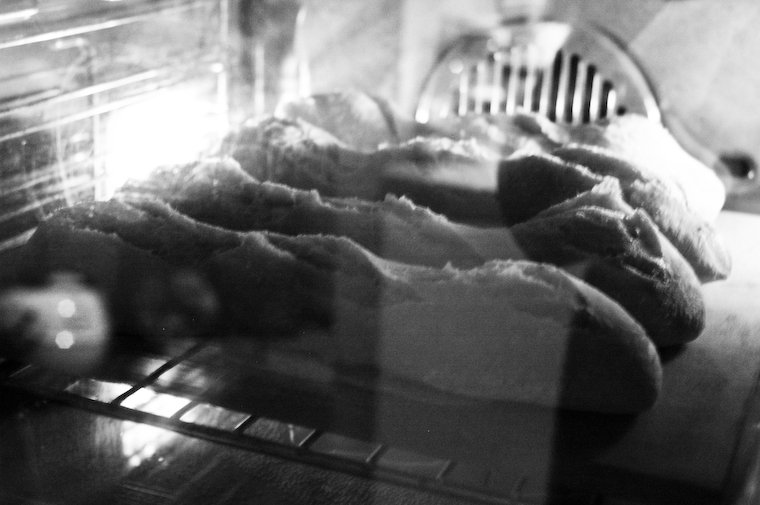
And indeed, from the very first attempt, the result was squeal-worthy: a good oven spring had pulled the slashed slits wide open, the tips and crust were crunchy enough that, when squeezed, the baguettes let out that delightful crackling sound, the crumb felt springy and alive, it was full of holes of various sizes and, more important, fragrant and flavorful.
I wish I could bottle the feeling I get when I watch my baguettes rise through the oven door, then super-peel them out and listen to them chirp as they cool.
I have baked a number of batches since that day, and if I could bottle the feeling I get when I watch my baguettes rise through the oven door, then super-peel them out and listen to them chirp as they cool, I would pose a major threat to antidepressant manufacturers.
We do, however, continue to go out and buy baguettes from Coquelicot on a regular basis, especially when we have friends over: as tickling as it would be to serve a meal that’s homemade right down to the baguettes, it’s just not realistic for me to cook dinner and bake bread on the same day — not if I want to stay awake throughout the evening anyway. But home-baked bread makes quite an impression as a host(ess) gift, I’ve noticed, so that’s my favored way of sharing.
Tips for making this baguette recipe
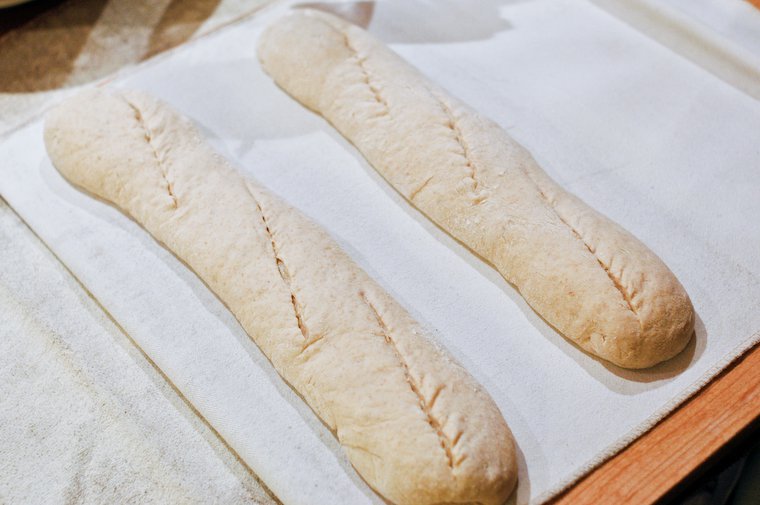
I should note that my baguettes are, in fact, demi-baguettes (half-baguettes), due to the limited width of my home oven. You can make them slimmer and call them ficelles or flûtes (literally, strings or flutes), if you prefer, dividing the dough into six rather than four pieces, but then you’ll have to bake them in batches, otherwise they won’t have enough elbow room for optimal air circulation. Conversely, you can divide the dough into just two pieces to make bâtards. In all cases, remember to adjust the baking time to the size of the loaves.
Because the dough needs to rest in the fridge for 12 to 24 hours, it means you can really make it work within your own schedule: I generally feed my starter in the morning on day 1, make the dough in the afternoon when the starter is ripe, then bake the baguettes in the morning or in the afternoon on day 2.

Have you tried this? Share your pics on Instagram!
Please tag your pictures with #cnzrecipes. I'll share my favorites!
Ingredients
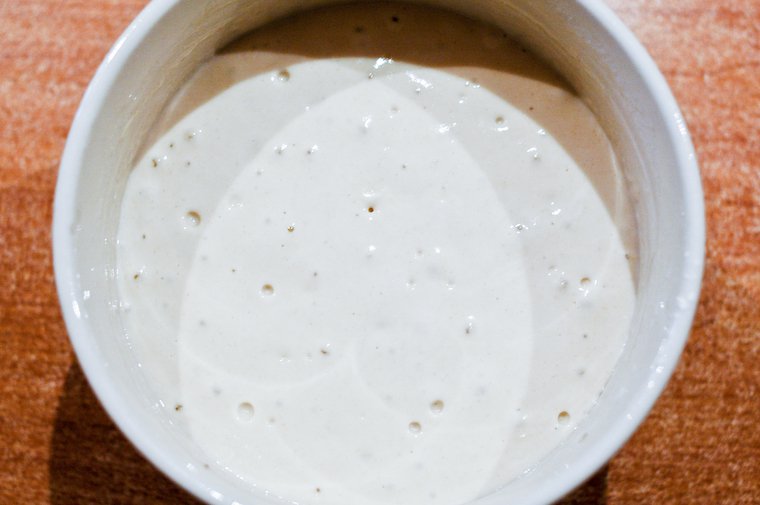
- 200 grams (7 ounces) ripe "100%" natural starter (see note, plus picture below)
- 600 grams (21 ounces) wheat flour or a mix of flours (I use one third T65, one third T80, one third T110, i.e. a mix of white and partially whole wheat flours)
- 400 grams (14 ounces) purified water
- 1 tablespoon powdered gluten (optional, but useful if you're working with French flours, which tend to be on the soft -i.e. low-gluten -side; you'll find it in natural food stores)
- 10 grams (2 teaspoons) sea salt (I use unrefined gray salt from Guérande)
- a flexible dough scraper such as this one, this one or this one
- a plastic shower cap (the kind you get in hotel bathrooms)
- a dough cutter (you can use the straight edge of the dough scraper, but a dough cutter is sharper and more efficient)
- a linen kitchen towel you will reserve for your bread-making (I bought mine in bulk at the Marché Saint-Pierre fabric store in Paris)
- a square or rectangular baking stone (mine came with my oven and is a 35-cm [13-3/4-inch] square)
- a pizza peel
- a baker's blade
Instructions
- Your starter is ready for use when it looks a little puffy and has some bubbles on the surface, but not too many; see picture below. In normal Paris weather conditions, my starter reaches this point about 6 hours after I've fed it its own weight in flour and its own weight in water. (I start with 65 grams starter and feed it 70 grams flour plus 70 grams water, which results in 205 grams ripe starter -the extra 5 grams account for what will stay on the sides of the bowl and on the spatula).
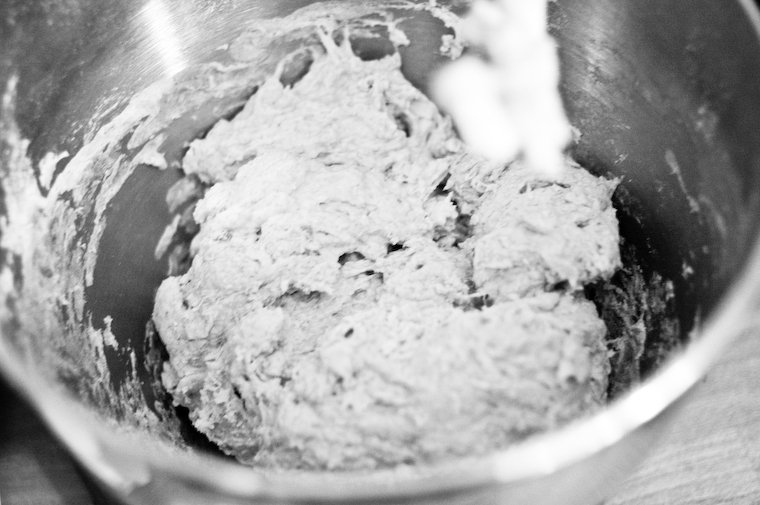
- In a large mixing bowl, or in the bowl of your stand mixer, combine the flours, water, starter, and gluten if using, until the mixture forms a shaggy mass and all the flour is incorporated. (I stir by hand with the dough hook first, then run my KitchenAid mixer on speed 1 for 20 seconds, just until everything is combined; you could use a dough whisk or a simple wooden spoon.)
- Let the mixture sit for 20 to 40 minutes. This is the autolyse step: it allows the flour to absorb the water before the salt has a chance to draw it away.
- Add the salt, and knead with the dough hook on low speed for 5 minutes. If you're working by hand, and don't feel comfortable kneading such a shaggy dough on the counter, you can simply "fold" the dough over itself with a dough scraper, as demonstrated in this video, for about 7 minutes.
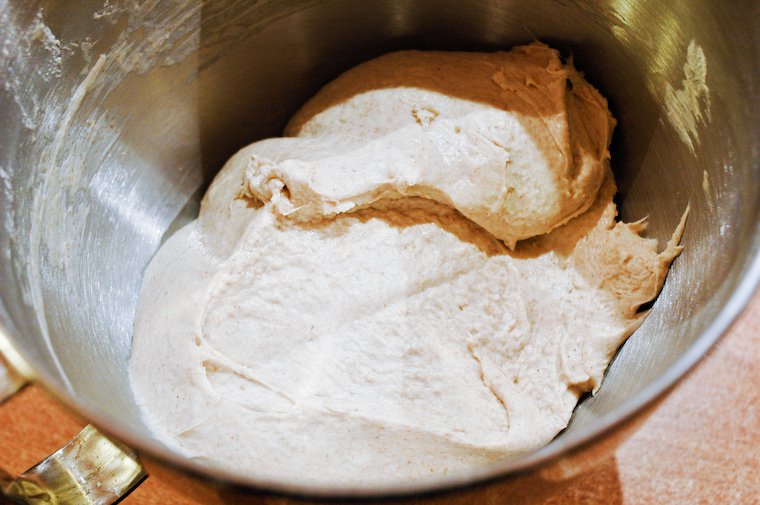
- Cover with a kitchen towel and let the dough rest at room temperature for 1 hour. After an hour, fold the dough over itself (as demonstrated in this video) about a dozen times -this helps give oxygen to the yeasts in the dough, it develops the flavors and builds a well-structured crumb -and cover with the kitchen towel again.
- Let rest for 1 hour and fold again as above.
- (At this point, I transfer the dough to a different bowl -- 2 liters/quarts in capacity -- because the bowl of my KitchenAid does not fit in my fridge, but this is optional.)
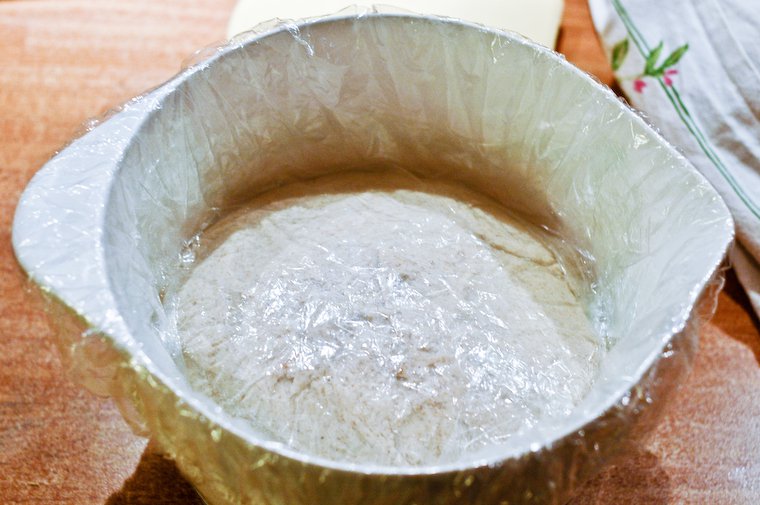
- Apply a piece of plastic wrap directly on top of the dough, and a shower cap around the rim of the bowl. Push the shower cap down until it touches the plastic wrap -you want the cover to be somewhat airtight -and place the bowl in the fridge for 12 to 24 hours. (Note: when I'm all done baking, I let the plastic wrap dry so I can shake off the little flakes of dough, and save the plastic wrap and the shower cap for use with my next loaf.)
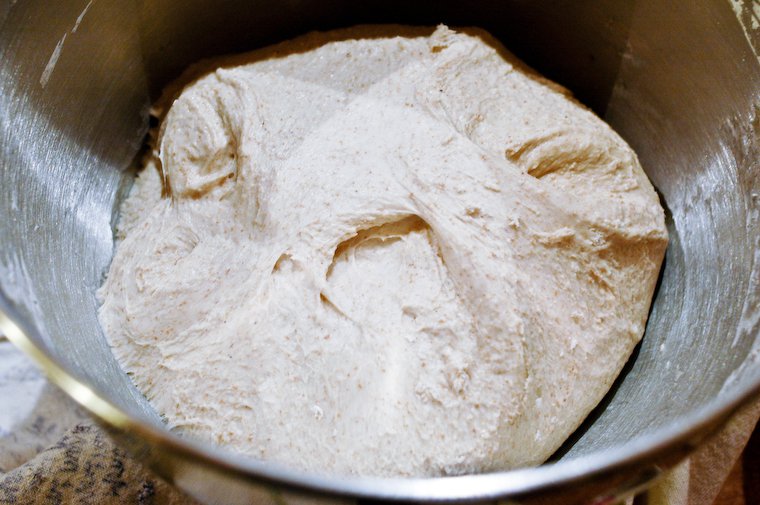
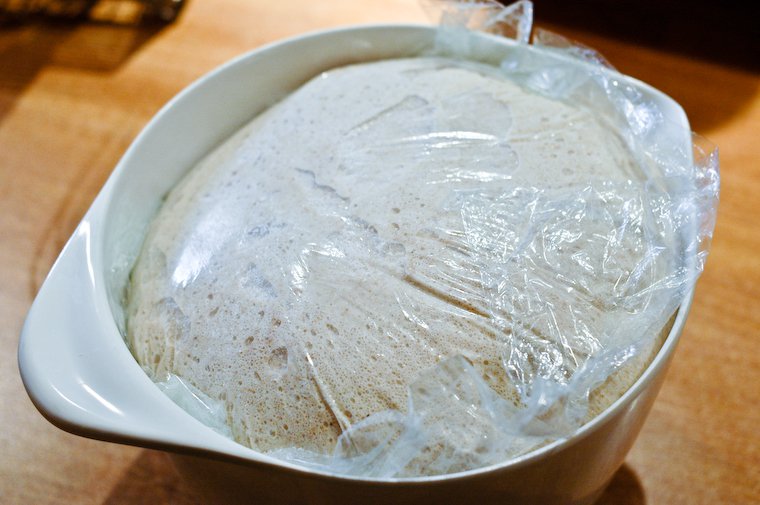
- Remove the bowl from the fridge; the dough should have about doubled in size.
- Remove the plastic wrap and replace it with the kitchen towel. Let the dough come back to room temperature, about 1 hour.
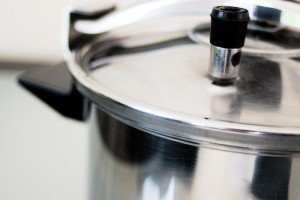
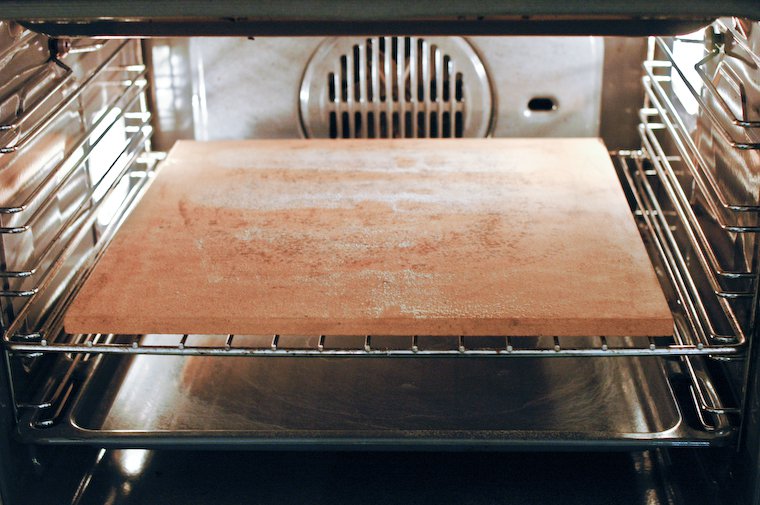
- Place a square or rectangular baking stone on the middle rack of your oven and preheat it to 300°C (570°F) or whatever the highest temperature setting is on your oven, for 30 minutes. If you don't have a baking stone, preheat the oven to 240°C (460°C) and line a cookie sheet with parchment paper.
- Have ready a well floured linen kitchen towel that you will reserve for this use (no need to wash it after baking; the more you flour and use it, the less it will stick).
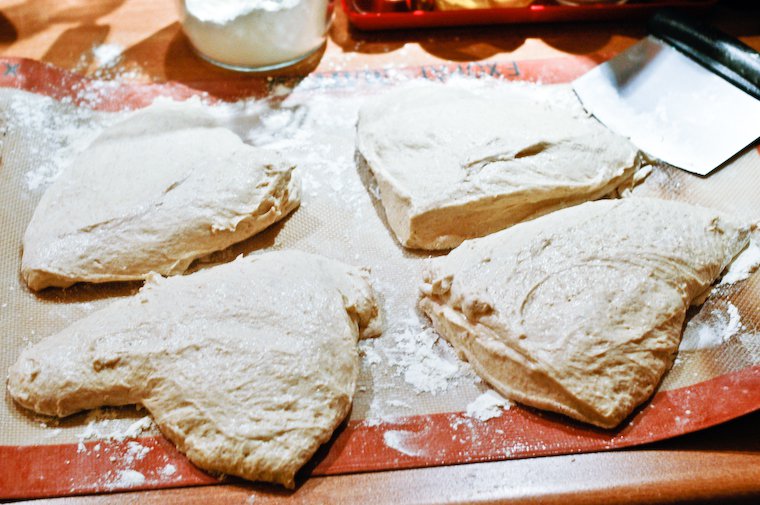
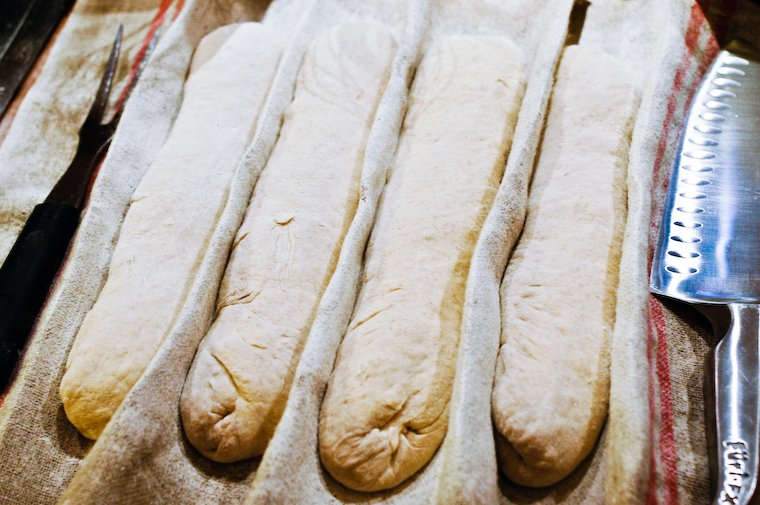
- Turn the dough out onto a well floured surface (I dust an old silicone baking mat heavily with flour). Divide it into four pieces of equal size; it's hard to get them to be identical, just do your best, or use a scale to adjust.
- Shape each piece into a log, as demonstrated in the first half of this video. This is called preshaping. Give the logs a short rest, 5 to 10 minutes.
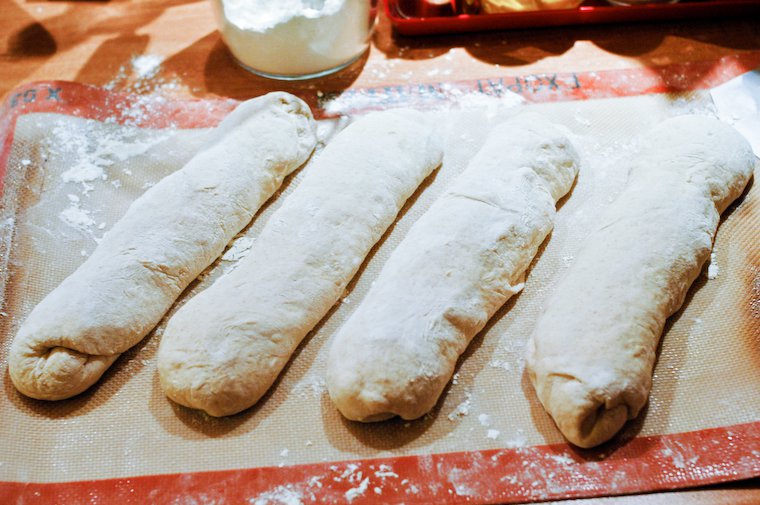
- Roll each log on the counter to elongate their shape, but make them no longer than the width of your baking stone (or cookie sheet). After shaping each baguette, place it on the floured kitchen towel and pull the cloth up on each side to form a ridge that will support its shape (see picture below). Cover with a kitchen towel and allow to rest for the remainder of the preheating.
- During the last 5 minutes of preheating, insert a rimmed baking sheet in the lowest rack of the oven, underneath the pizza stone. Bring about 360 ml (1 1/2 cups) water to the boil in the kettle.
- Just before you're ready to insert the baguettes in the oven, make sure you wear something with long sleeves and put on an oven mitt. Using a vessel with a pouring spout (such as a measuring jug), pour half of the boiling water into the rimmed baking sheet -it will sizzle and steam and it will be a bit scary -and close the oven door right away.
- This is to create a nice, steamy environment, to foster the formation of a nice crust. Be careful not to burn yourself as you do this -that is what the long sleeve and oven mitt are for -and keep kids and pets out of the kitchen for this step.
- If you're using a baking stone, place 2 of the baguettes on a well-floured pizza peel; if you've noticed your baguettes are not quite all the same size, start with the two biggest ones. Slash each of them 3 times with a baker's blade or a sharp knife, working the blade at a 45° angle. Slide them onto the pizza stone, working quickly to prevent the heat and steam from escaping.
- Repeat with the 2 remaining baguettes. Pour the remaining water into the rimmed baking sheet, and lower the temperature to 220°C (430°F).
- If you don't have a baking stone, arrange the four baguettes on the prepared cookie sheet. Slash them as directed and insert into the middle rack of the oven. Pour the remaining water into the rimmed baking sheet, but don't lower the temperature.
- Bake for 20 to 25 minutes, rearranging them after 15 minutes so the ones at the front of the oven will be in the back and vice versa, until the baguettes are golden brown, and sound hollow when tapped at the bottom. If the color is good but they sound like they could use a little more baking, turn off the oven and leave the baguettes in for another 5 to 10 minutes.
- Transfer to a rack to cool for an hour before eating.
Notes
A “100%” starter is fed an equal weight of flour and water at every feeding. To learn more about starters, please refer to my post on natural starter bread.