Fire-and-Forget Pork Carnitas

When Maxence and I moved back to Paris after living in California, one of the things we missed most sorely was Mexican food. Sure, there were a couple of Mexican restaurants in the city, but there was something a little dusty and unexciting about them. They lacked the freshness, simplicity, and fun that we’d come to expect from our favorite taquerias back in the States.

Fast forward a few years, and we were positively thrilled to see Mexican food in general, and tacos in particular, become the new “it” cuisine among hip Parisians, with new spots popping up on the map at a rapid pace (though not as ridiculously so as burger places).

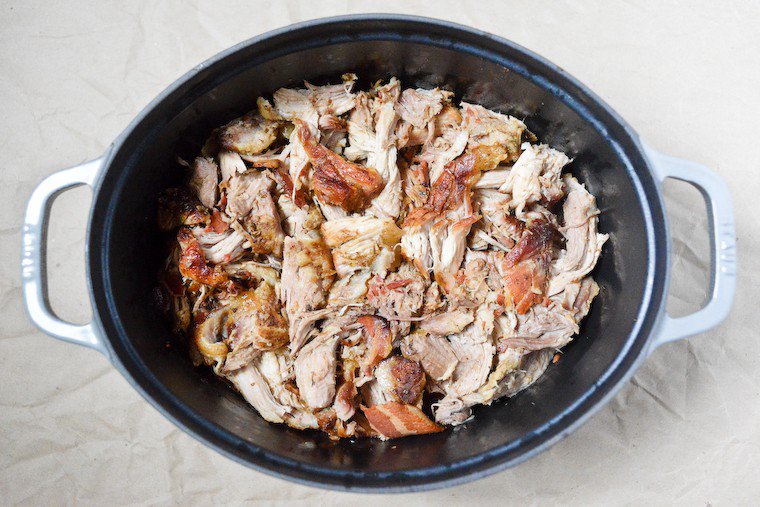
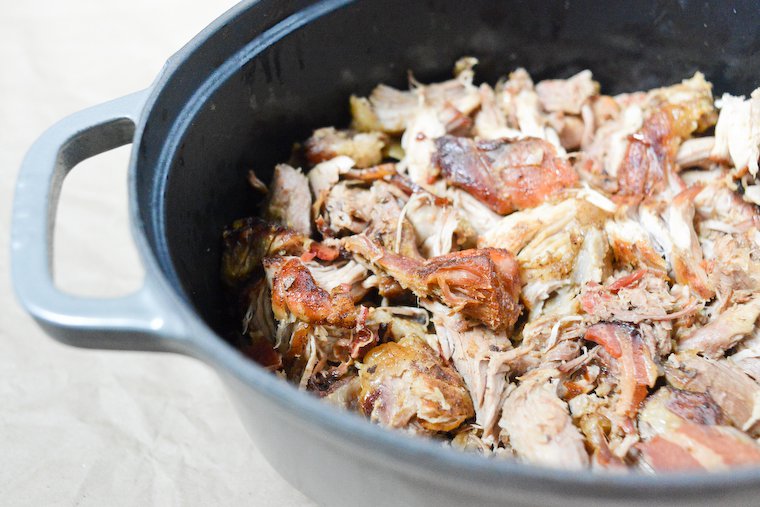
It’s one of those incredibly simple, incredibly rewarding recipes that have you braise the meat for hours with no human intervention, until you have exceedingly tender meat that pulls apart into gloriously moist shreds and caramelized bits.

Not all of them got it right, but we happily tried as many as we could — up until the recent opening of a new El Nopal location in our neighborhood, just off Place Pigalle, when we declared ourselves content. It’s a tiny, corridor-like shack where the team is friendly (and actually Mexican; the owner is from Monterrey), everything is super fresh, and we find ourselves going practically every week, tasting our way through their different taco fillings — asada, carnitas, deshebrada, tinga, cochinita… the list goes on.

Believe it or not, this has not sated our hunger for Mexican food, and I’ve taken to making my own carnitas so we can have taco nights at home every once in a while. It’s one of those incredibly simple, incredibly rewarding recipes that have you braise the meat for hours with no human intervention, until you have exceedingly tender meat that pulls apart into gloriously moist shreds and caramelized bits. (For a detailed discussion on the ins and outs of making carnitas, read this food lab piece.)

I’ve occasionally made my own corn tortillas (I actually own a tortilla press, that’s how committed I am) but for a quicker preparation, pliable lettuce leaves from a crisp head work beautifully. Place a few simple toppings on the table — finely diced onion, chopped cilantro, avocado slices, lime wedges — and you’re in business.

The recipe uses a whole pork shoulder, which you should get from a good butcher so it’s not pumped with antibiotics, and it makes quite a bit, but carnitas freeze well, so you can stash away any extra meat for a super easy dinner you’ll be grateful for sometime down the road.

Join the conversation!

Are you a fan of Mexican cuisine? Do you have a local taqueria you love? What’s your favorite Mexican recipe to make at home?

Pork Carnitas

Continue reading »

Homemade Coconut Milk Yogurt

On a quick trip to London a year and a half ago, I spent an embarrassing number of hours exploring the aisles of the Kensington Whole Foods, stocking up on amazing British bean-to-bar chocolate and the paleo granola that inspired my own.

In the dairy aisle I noticed with great curiosity that they sold coconut milk yogurt, and bought a small tub to have at breakfast the next morning — you know how I feel about hotel breakfasts. One spoonful and I was smitten: it had the smooth texture and lovely tang of dairy yogurt, but it was wonderfully aromatic, with that one-of-a-kind, subtle sweetness that coconut milk brings. You had to taste it to believe it.

Coconut milk yogurt had the smooth texture and lovely tang of dairy yogurt, but it is wonderfully aromatic, with that one-of-a-kind, subtle sweetness that coconut milk brings.

It was also fairly pricy (£2 for 125 g, that’s 2.80€ or 3$ for a half-cup, i.e. £16, 22.50€ or $25 for a liter/quart) and unavailable in France. So I resigned myself to see it as a once-in-a-blue-moon indulgence.

Until just a few of weeks ago, when I chanced upon this tutorial and saw the light: you can make your own coconut yogurt at home! From regular canned coconut milk! Available at the store!

The process is just as easy as making ordinary yogurt from cow’s or goat’s milk, which I do weekly: you simply combine the coconut milk with yogurt ferment or a probiotic supplement, and leave it to incubate at a steady, moderate temperature (around 40°C or 105°F) until the coconut milk is cultured, which takes 24 hours for the level of tang I like.

And I’ve been loving my homemade coconut milk yogurt. It’s a treat in and of itself, but I love it with a sliced-up banana and some granola, or dotted with berries, and I think it would make an excellent base for frozen yogurt. The yogurt tends to separate slightly, with a thin layer at the bottom and another of set coconut oil at the top, but I just stir it all back together before eating.

To get a thicker, more set yogurt, I have also experimented with adding gelatin (the grass-fed beef kind) to the mix, and although it complicates the process a little — you have to heat up some of the coconut milk to dilute the gelatin, but you shouldn’t add the ferment to too hot a liquid or you’ll kill the microorganisms — I like the end result even better. I’ve outlined both formulas below. (And obviously, the addition of the gelatin means you can no longer call this vegetarian.)

From a price perspective, my coconut yogurt works out to about 15€ (£11 or $17) per litre/quart, which remains more expensive than making yogurt from animal milk, but is notably cheaper than store-bought coconut yogurt.

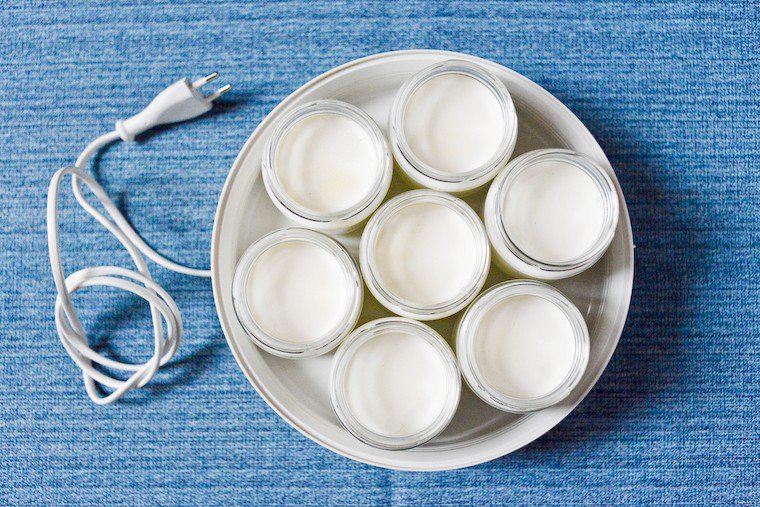
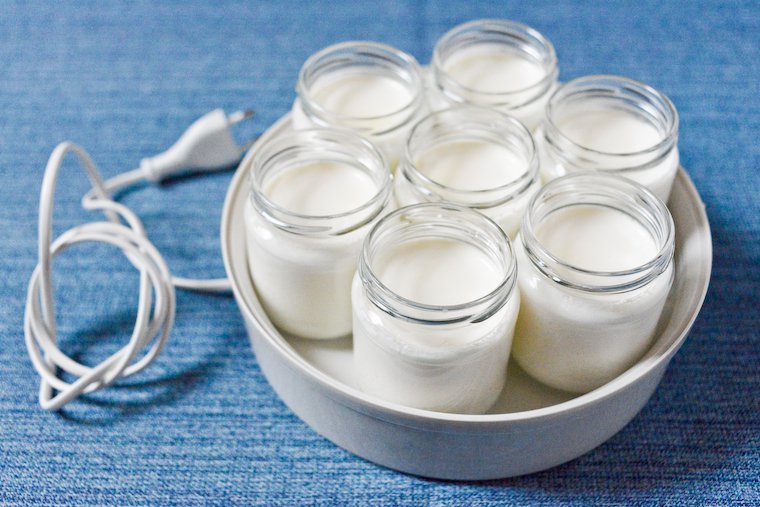
If you don’t have a yogurt maker, you can use the light inside your oven to generate the required heat (as outlined in the recipe below), but getting a yogurt maker is a small investment I promise you won’t regret. There is no need for anything fancy: I have a super basic model that doesn’t cost very much, and does the job perfectly. The one I own is equivalent to this model in the US, but if you live elsewhere, here are my criteria for choosing a yogurt maker:

  • Glass jars: the cocktail of plastic and heat is an ugly one, and because you’ll be reusing the jars again and again, you want them to be inert and heat-resistant, i.e. made out of glass.
  • No automatic shut-off: many models turn themselves off automatically after a few hours (6 to 8, depending on the model) because they consider that the yogurt is done after that time. However, you may like your yogurt tangier (incubated longer), or you may want to make 24-hour yogurt if you have trouble with lactose, or you may want to make coconut yogurt, which takes 24 hours also. I understand the convenience of the automatic shut-off, but I prefer to set an alarm for myself and keep control of the incubation duration. Conveniently, these manual models are also cheaper!
  • The possibility of getting extra jars: you definitely want a double load of jars right from the start, so you can begin a new batch of yogurt before you’ve eaten (and cleaned) your way through the previous one. Also, breakage happens (ahem).
  • There are single-container models that allow you to make the yogurt in bulk rather than in individual jars, but for my own use I find it much more convenient to have the yogurt pre-portioned and ready to grab in the fridge.

The coconut milk I use for these yogurt is one I buy at the organic store (the Organi brand) which costs 2.49€ per can, is 15% fat, and has no BPA in the inside lining (I’ve checked with the manufacturer). As for the ferment, I’ve successfully used this yogurt starter as well as this probiotic supplement, which has 7 billion probiotics (Lactobacillus, Bifidobacterium, Lactococcus, and Streptococcus strains) in each dose.

Join the conversation!

Do you make your own yogurt? What’s your prefered method? Have you ever tried it with non-dairy milk?

Coconut Milk Yogurt

Continue reading »

Grilled Sweet Potatoes with Black Olives and Almonds

When I was growing up, sweet potatoes never ever appeared on the menu: they don’t belong to the classic trove of French vegetables, and I don’t think I had a taste until I moved to the US in my early twenties. But I quickly grew to love and crave them as if they had been a part of my food landscape all of my life: the sweet flesh and versatility of these tubers makes them a delicious alternative to other starch options, especially regular white potatoes, and I indulge on a regular basis.

It doesn’t hurt that orange sweet potatoes (there are also white, less recommended varieties) have been touted a superfood for their exceptional antioxidant and anti-inflammatory properties, due to their super high content of beta-carotene and vitamin A, among other vitamins and minerals. They are also said to have a stabilizing effect on blood sugar, despite a medium glycemic index.

On top of the wedges I sprinkle a lovely chopped condiment of black olives, toasted almonds, shallot, cilantro, and lemon zest, that brings a remarkable zing to the whole dish.

Steaming is the best way to retain the entirety of their nutritional qualities, but they do beautifully when you boil, roast or grill them as well. You can serve them mashed, turn them into fabulously creamy soups, add them cubed to grain dishes and meal-size salads to make them extra satisfying, or purée them for use in cakes as a sweetener.

They are included in the “clean fifteen” list* but I usually buy organic ones, making sure they are nice and firm with no bruises. They are increasingly easy to find in supermarkets, organic or not, and I have found that sweet potatoes from the US have a moister flesh and keep longer. I store them in a paper bag at cool room temperature (never in the fridge!) and when I cook them I leave the skin on, both for nutrition and to help the pieces keep their shape if that’s needed for a particular dish.

I am always surprised to see sweet potatoes often paired with sweet ingredients in North America (maple syrup! sweet spices! brown sugar! marshmallows!) as I much prefer to balance their natural sweetness with contrasting flavors: tangy, sour, acidic, savory, umami… And because their flesh becomes quite tender when cooked, I usually take care to add an element of crunch to the recipe I use them in.

One of my quickest and easiest tricks to serve sweet potatoes is to boil or roast them — either whole or in cubes — and top them with my simple tahini sauce and lots of freshly snipped herbs, or Aria Beth Sloss’s miso butter topping.

But in warmer months, when I have access to a barbecue — or just my trusty griddler — I like to cut the sweet potatoes into long wedges, par-steam them, brush them with a mix of oil and lemon juice, and grill them. I love the mix between lightly crisp outer skin and the creamy soft insides.

On top of the wedges I sprinkle a lovely — and very quick to throw together — chopped condiment of black olives, toasted almonds, shallot, cilantro, and lemon zest, that brings a remarkable zing to the whole dish. This I’m happy to feature as the centerpiece of the meal, along with a green salad, or to serve as a side with roast chicken, duck magret, or grilled pork.

Join the conversation!

Are you a sweet potato fan? What’s your favorite way to serve them?

Grilled Sweet Potatoes with Black Olives and Almonds

* The clean fifteen is a list of the least contaminated conventional produce; the dirty dozen lists the most contaminated.

Want more amazing sweet potato recipes?

Follow my sweet potato board on Pinterest!

Continue reading »

Lemon Verbena Recipes: 35 Ways to Use Lemon Verbena

Starting in mid-spring, the guy I get most of my produce from brings in long stalks of verveine citronnelle, bushy with feather-shaped leaves, faintly sticky and powerfully fragrant. Rub one with your thumb and it will knock you over with a floral and citrusy scent that does bear resemblance to lemongrass, as the French name points out (citronnelle means lemongrass).

The most natural thing to do with the leaves is to infuse them for herbal tea, to be served hot of chilled, but I was looking for more ideas so I turned to you — via Twitter et Facebook — and the Internet for suggestions. Here’s a compendium below; I hope you find it inspiring if you come across that lovely herb yourself!

Happy pairings for lemon verbena recipes

Lemon verbena + Peach
Lemon verbena + Apricot
Lemon verbena + Raspberry
Lemon verbena + Strawberry
Lemon verbena + Rhubarb
Lemon verbena + Pear
Lemon verbena + Citrus (especially grapefruit)
Lemon verbena + Yogurt
Lemon verbena + Ginger
Lemon verbena + Fish
Lemon verbena + Chicken
Lemon verbena + Pork

Beverages with lemon verbena

~ Make herbal tea, hot or iced, with lemon verbena on its own or mixed with other herbs, such as mint or sage.

~ Prepare a simple syrup for cocktails, non-alcoholic spritzers, iced tea, or lemonade.

~ Make a liqueur.

Lemon verbena recipes for baking and desserts

~ Add it to a rhubarb tart.

~ Make sorbet or ice cream.

~ Infuse it in the cream for panna cotta and other custard-style desserts, such as crème brûlée, and pots de crème.

~ Infuse it in the whipped cream for peaches and cream.

~ Make a simple syrup to moisten a sponge cake or a rum baba, drizzle onto crêpes and yogurt, or dunk in some ladyfingers for a strawberry charlotte or tiramisu.

Continue reading »

Vegan Chocolate Chip Cookies

Hand-crafted mini cutting board from my friend at Earlywood!

I suffer from the curse of the restless baker: however much I like a recipe I’ve borrowed or created in the past, I am wildly tempted to venture a little further, tweak it some more, or walk another path entirely, just to see what will happen.

This makes every opportunity to bake an adventure, and although I sometimes kick myself for not simply going for the tried and true — I do have to live with the occasional disappointment — most of the time it’s a chance to learn something new, expand my repertoire, and of course, share a novel recipe with you.

Crisp on the outside with a moist and tender heart, they’re big on the chocolate flavor and moderately sweet, just the way I like them.

And I am particularly excited to bring you this one, born out of a craving for chocolate chip cookies. I could have gone for this ultimate chocolate chip cookie recipe, which I’ve made again and again to sighs and swoons from all involved, but I wanted to try something different this time and make a vegan chocolate chip cookie instead.

With almond butter as the fat, some ground chia seeds, a mix of rice and wheat flours, and unrefined sugar, I like to think these are a little better for you than the conventional cookie (or at least they’ll bring some ingredient variety to your overall diet) yet they are just as satisfying. Crisp on the outside with a moist and tender heart, they’re big on the chocolate flavor — I threw in some cacao nibs as well — and moderately sweet, just the way I like them.

So this one is definitely going into the cookie rotation. I’ll try not to mess with it further, though I can’t promise I won’t try different nut butters (peanut would be great in there too) or a handful of chopped nuts, maybe pecans or hazelnuts.

One final note: as always with anything chocolate, the devil is in the brand you choose: going out of your way to buy a high-quality bittersweet chocolate will pay dividends beyond what you can imagine. I myself like to use Valrhona’s Manjari 64% couverture chocolate, which I get by the kilo (two-pound) bag at G. Detou in Paris, but is also available online.

Join the conversation!

Are you a compulsive tinkerer as well, or do you enjoy making your classics again and again? And what is your favorite chocolate for baking?

Hand-crafted mini cutting board from my friend at Earlywood!

Hand-crafted mini cutting board from my friend at Earlywood!

Continue reading »

Get the newsletter

Receive FREE email updates with all the latest recipes, plus exclusive inspiration and Paris tips. You can also choose to be notified when a new post is published.

View the latest edition of the newsletter.