To celebrate Easter this weekend, I made hot cross buns, the brioche-like spiced loaves the British bake and serve on Good Friday*. I have made them on previous occasions, but instead of following the recipe I used last time, I decided to take a leaf from Dan Lepard‘s book.
I loosely followed the process he describes — the overnight fermentation in the fridge, in particular — but converted the recipe to use my sourdough starter, though the recipe below gives instructions both with and without a starter.
The classic hot cross bun is studded with raisins or currants, and sometimes candied citrus peel, but I had an entirely different picture in my mind: this year, I wanted to make them with white chocolate, pistachios, and dates.
And because I’m trying to clear out my fridge before Maxence and I leave for Japan later this week, I also modified the recipe to incorporate a half-tub of crème fraîche that needed using: various French brioche recipes call for it, and here it came to replace all of the butter and part of the milk, a substitution that brings a bit more tang and fluff to the crumb. I also lowered the amount of sweetener used in the dough itself, to account for the nontraditional filling I’d plotted.
You see, the classic hot cross bun is studded with raisins or currants, and sometimes candied citrus peel, but I had an entirely different picture in my mind: this year, I wanted to make hot cross buns garnished with white chocolate, pistachios, and dates.
The white chocolate and pistachio combo is inspired by little brioches I’ve seen sold at Eric Kayser’s bakery, and I added some diced date paste because I had some on hand, and I knew it would make for a harmonious trio.
I’m ordinarily not a fan of white chocolate: I find it terribly two-dimensional from a gustatory standpoint so I would never just eat it on its own, but I’m open to using it as an ingredient to make other things, especially if it makes a certain someone happy.
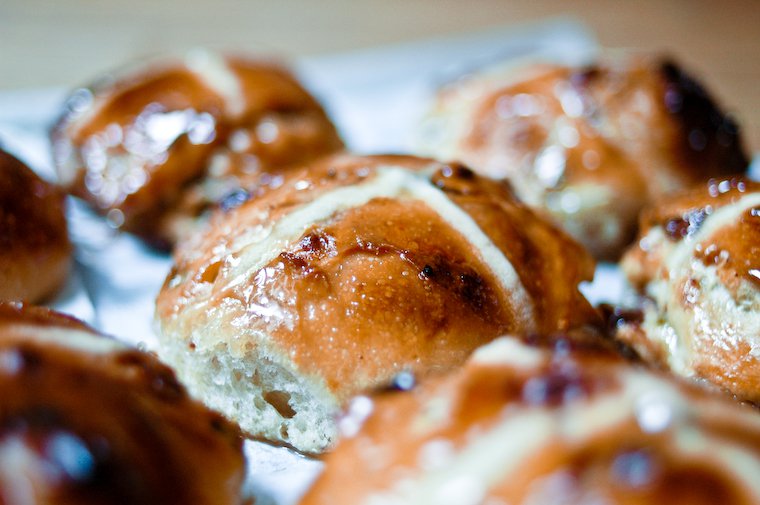
My remarkable selflessness was rewarded; it worked fantastically well. I’d expected the white chocolate to remain detectable as chunks in the finished buns, like bittersweet chocolate would, but what happened was a lot better: the white chocolate dissolved into the dough as it baked and candied at the edges, providing little jolts of lightly caramelized sweetness throughout the buns.
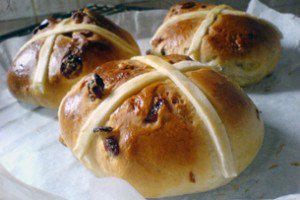
If you remember my previous post on the subject, I’d had trouble creating the cross that give these buns their name: though some bakers opt for a cross made of frosting or marzipan, I remain convinced that a hot cross bun needs to be toaster-proof, so a flour/water paste is the only way to go. But I wasn’t sure then what the consistency should be, and I ended up with strips of dough too firm to be pleasant.
I had better success this time: I made a thinner mixture of flour and water that I piped using a paper cornet — a simple piping bag that is folded from a triangle of parchment paper, and a handy tool to decorate cakes, breads, and plates. Those crosses melded nicely with the top of the buns so as to remain decorative without getting in the way of the buns’ softness.
Once the buns were baked, I brushed them with the easy sugar glaze Dan suggested, and this makes all the difference in terms of looks (shiny bun!), texture (sticky bun!) and flavor (sweet bun!).
We enjoyed our first taste fresh from the oven, and loved them immediately. After that, hot cross buns are traditionally split in two horizontally, toasted, and spread with butter or jam. I think this version is sweet enough that adding jam is gilding the lily, and I actually skip the butter as well, but I’ll let you decide what you do with your buns.
And of course, while these are typically an Easter-time treat, the 1592 decree that forbid their sale outside of Good Friday, Christmas, and burial days has long been repealed, so you’re free to use the recipe at other times of year, perhaps changing the cross symbol into another decoration to suit the occasion.
* To learn more about the origins of this culinary tradition, see this collection of excerpts from the invaluable Food Timeline website.

Have you tried this? Share your pics on Instagram!
Please tag your pictures with #cnzrecipes. I'll share my favorites!
Ingredients
- 120 grams (4 1/4 ounces) ripe 100% starter (see note) [optional, see alternatives below]
- 340 grams (12 ounces) all-purpose flour (I used an organic French T55 flour) [if you don't use a starter, use 400 grams (14 ounces)]
- 1/2 teaspoon dry yeast (I use the SAF brand) [if you don't use a starter, use 2 teaspoons]
- 175 ml (3/4 cup) milk, at room temperature [if you don't use a starter, use 225 ml (1 cup minus 1 tablespoon)], plus a little for brushing
- 125 grams (1/2 cup) crème fraîche (or equal parts sour cream and heavy cream)
- 50 grams (6 tablespoons) raw pistachios (untoasted and unsalted), roughly chopped
- 100 grams (3 1/2 ounces) good-quality white chocolate, chopped to chocolate chip size
- 100 grams (3 1/2 ounces) date paste (or pitted dates), diced or chopped to chocolate chip size
- 1 tablespoon agave syrup (substitute honey, golden syrup, or maple syrup)
- 1 1/2 teaspoons salt
- zest of 1/2 organic lemon or orange, finely grated
- 1 teaspoon ground cinnamon (I use fresh cinnamon from Cinnamon Hill)
- 2 tablespoons all-purpose flour
- 2 tablespoons water
- 50 grams (1/4 cup) sugar (I use a raw cane sugar in which I leave a vanilla bean to infuse)
- 50 ml (3 tablespoons plus 1 teaspoon) water
Instructions
- In a large mixing bowl, or in the bowl of a stand mixer, combine the flour, starter if using, yeast, milk, and crème fraîche to form a shaggy mass, making sure all of the flour is incorporated. Let rest at room temperature for 30 minutes.
- In the meantime, place the pistachios, white chocolate, date paste, syrup, salt, zest, and cinnamon in a medium bowl, and stir until thoroughly combined.
- Add the pistachio mixture to the shaggy dough and fold it in with a sturdy spatula or the dough hook of the stand mixer until incorporated. Continue to fold the dough (as demonstrated here) for 4 minutes -- or set the stand mixer on low speed -- until the dough starts to get a little smoother.
- Place a piece of plastic wrap directly on the surface of the dough, cover the bowl with a plate, and place in the fridge for 12 to 18 hours.
- The next day, remove the dough from the fridge, remove the plate, and let rest for 30 minutes; it should have risen moderately, not quite doubled. Line a baking sheet with parchment paper or a silicone baking mat.
- Turn the dough out onto a lightly floured working surface -- the dough will be fairly sticky, but if you work quickly while it is still cold from the fridge, you will be fine. Divide into 12 equal pieces (about 90 grams or 3 1/6 ounces each), trying to make sure the fillings (pistachios, dates, white chocolate) are more or less evenly distributed.
- Shape each piece into a squarish bun (the dough is a bit sticky, just do your best) and place them on the prepared baking sheet, leaving about 2.5 cm (1 inch) of space between them: you do want them to touch as they rise and bake.
- Cover with a clean towel (to prevent the towel from resting upon and therefore sticking to the buns, I improvized a "tent" over the baking sheet by balancing the towel on a few objects) and let rest for 2 1/2 hours, until they've risen to about 1.5 times their original size.
- Preheat the oven to 180°C (360°F).
- Brush the buns lightly with milk (this will foster browning).
- Prepare the flour paste for the crosses: in a small bowl, place the flour and water and whisk with a spoon until smooth; it should have a consistency a bit like face cream, spreadable but not too thick. Spoon this mixture into a small paper cone (a cornet) assembled from parchment paper as demonstrated here. Snip the tip of the cone to form a 3-mm (1/10-inch) opening and pipe the flour paste over the buns to form a cross.
- Insert the baking sheet in the middle of the oven and bake for 35 to 40 minutes, until browned. Transfer to a cooling rack.
- While the buns are baking, prepare the glaze: combine the sugar and water in a small saucepan. Bring to the boil, stirring from time to time to ensure the sugar dissolves, and let the syrup boil for 2 minutes, until slightly thickened. Brush the buns with the glaze while they're still warm; the glaze will remain quite sticky on the day of baking, but will be less so on subsequent days.
- Once cooled, hot cross buns should be split in two horizontally and toasted.
Notes
- A "100%" starter is fed an equal weight of flour and water at every feeding. To learn more about sourdough starters, please refer to my post on natural starter bread.
- The hot cross buns will keep for a few days at room temperature, tightly wrapped. You can also freeze them.


