Apricot Blueberry Cobbler

I’d been living in California for a few months and thoroughly enjoying the dotcom vibe of my workplace when the big news was announced: we were going to have a company barbecue.

This, to me, was what working in the Silicon Valley at the turn of the century was all about: a lot of fun ideas to make employees happy (water guns! foosball table! free pizza on Fridays!) and therefore more inclined to put in the hours and brain juice that would help the company grow (until it didn’t, but that’s another story).

A cobbler, someone explained, is someone who mends shoes. This didn’t make much sense to me, so I gently inquired: okay, but, um, why? My American-born coworkers conferred for a while, spoon in mid-air, brow furrowed, until they had to admit no one had a reasonable explanation.

And so, on barbecue day, everyone pitched in — some set up the burger assembly station, others grilled the burger patties (and veggie substitutes, this was California after all), others yet plopped scoops of salad (potato or pasta salad, I mean) onto plates, or rounded up anyone still hiding out in his cube — before sitting down on the sunny deck at the back of our offices to dig in.

A few people had volunteered to bring dessert, and among them, someone (Barbara, from client ops) had baked a peach cobbler.

While people oohed and aahed, I asked: what’s a cobbler? A cobbler, someone explained, is someone who mends shoes (un cordonnier in French). This didn’t make much sense to me, so I gently inquired: okay, but, um, why? My American-born coworkers conferred for a while, spoon in mid-air and brow furrowed, until they had to admit no one had a reasonable explanation.

No matter: we all know where the proof of the pudding is, and this one was very good indeed.

A cobbler is one of those all-American desserts with funny names — together with the brown betty, the buckle, the grunt, the slump, and the pandowdy — in which seasonal fruit is topped with some sort of dough, and then cooked or baked.

In the case of the cobbler, the topping is a sugar-dusted biscuit dough that is strewn across the fruit, either in rough hand-torn pieces, as I like to do, or in neat rounds, if you prefer (though I suspect it only looks that way if you use the ready-made biscuit dough sold in canisters at the grocery store).

The cobbler is a nice change of pace from the crumble or the crisp, in that it offers a wider range of textures: the dough becomes browned and crisp at the top, remains tender like the insides of a scone in the middle, and melds with the juicy fruit at the bottom.

Because I was first introduced to the cobbler by way of Barbara’s, it remains iconically linked to peaches in my mind. But really, any ripe fruit can be used, and I particularly like the apricot and blueberry version I baked last week when friends came over for dinner.

I use almond flour in my cobbler dough for a smoother mouthfeel, and when I make it for stone fruit, I like to flavor it with a prudent splash of orange blossom water. It is often recommended to serve the cobbler with vanilla ice cream, but I am French and I like it better with crème fraîche: I think it does a better job at underlining the natural sweetness of the fruit.

If you’re still puzzled about the name, as I am, know that it may in fact be linked to the topping’s resemblance to the shape of cobblestones, or of cobbles, which are either rounded hills or lumps of coals. But the truth is nobody really knows — not even food history librarian Lynne Olver, who nonetheless offers quotes and references that speaks to the origins of the dish.

(And for more desserts in the cobbler family, see this rhubarb raspberry grunt and this brown butter spiced crisp.)

Apricot Blueberry Cobbler

Continue reading »

July Favorites

A few reads and finds from the past month:

~ I wrote a piece in the Wall Street Journal on How to Get the Most Out of Your Local Farmers’ Market, with recipes and photos (guest-starring my then four-month-old).

~ I was a guest on Public Sénat’s television show La Politique c’est net to discuss food blogs and social media. You can watch the video (in French).

~ 10 best spots for ice cream in Paris.

~ I am having fun with these French/English language puzzles — great to while away a train ride this summer!

~ How to have a better lunch at your desk.

~ Happy news: Ippudo is finally coming to Paris! We’ll see if they use the same sesame mills I fell in love with at their NYC location.

~ How to double the antioxydants in your salad greens.

~ 10 French pastry chefs to follow on Instagram.

~ Inspired to make these rhubarb squares, this vegan curry with sweet potato noodles, this grilled chicken shawarma, and this szechuan eggplant. For more recipe inspiration, follow me on Pinterest!

~ How to pack for two weeks in a carry-on (I wish someone would do a “traveling with kids” version!).

What about you: any great read or link to share?

Minimalist Kit for the Traveling Cook

I am going to be traveling these next few weeks, doing some simple cooking in a couple of rented kitchens, and I’ve had enough hair-pulling experiences with crappy, dull knives and flimsy plastic spatulas to be stashing a few key utensils in my luggage this time.

Because I am also traveling with a toddler and a baby who need their own minimalist traveling kit — including such essentials as toy diggers, special blankets, and stuffed monkeys — I really need to make my kit as trim as possible, and have elected to bring along:

~ My paring knife, freshly sharpened: rented kitchens are notoriously lacking in this regard, and since half of cooking is cutting, trimming, slicing, dicing, chopping, and paring, this qualifies as an absolute must-bring. I will be following this tip on how to wrap knives for traveling.

~ My vegetable peeler because, again, anything that’s supposed to be sharp is going to be dull in a rented house, and a dull vegetable peeler is worse than no vegetable peeler at all. Also, a good vegetable peeler allows you to cut vegetables into tagliatelle and papardelle to make all kinds of pretty summer salads such as this zucchini noodle salad.

~ A pair of locking tongs because it’s rare (especially in France) to find it in a home cook’s utensil drawer, yet I rely on it heavily for handling ingredients, for stovetop cooking, and for grilling. As a bonus, it doubles up as a toy for the toddler, who uses it to catch imaginary fish.

~ My Earlywood scraper made of bloodwood, sturdy and smooth with a thin and sharp edge, and a fantastic multipurpose tool that can be used for stirring, cutting, lifting, and scraping. I have written about Brad Bernhart’s handcrafted utensils before, and they’ve become cherished items in my kitchen that get used every single day (including his latest creation, the adorable coffee scoop, which I use daily to serve my paleo granola).

Continue reading »

Fire-and-Forget Pork Carnitas

When Maxence and I moved back to Paris after living in California, one of the things we missed most sorely was Mexican food. Sure, there were a couple of Mexican restaurants in the city, but there was something a little dusty and unexciting about them. They lacked the freshness, simplicity, and fun that we’d come to expect from our favorite taquerias back in the States.

Fast forward a few years, and we were positively thrilled to see Mexican food in general, and tacos in particular, become the new “it” cuisine among hip Parisians, with new spots popping up on the map at a rapid pace (though not as ridiculously so as burger places).

It’s one of those incredibly simple, incredibly rewarding recipes that have you braise the meat for hours with no human intervention, until you have exceedingly tender meat that pulls apart into gloriously moist shreds and caramelized bits.

Not all of them got it right, but we happily tried as many as we could — up until the recent opening of a new El Nopal location in our neighborhood, just off Place Pigalle, when we declared ourselves content. It’s a tiny, corridor-like shack where the team is friendly (and actually Mexican; the owner is from Monterrey), everything is super fresh, and we find ourselves going practically every week, tasting our way through their different taco fillings — asada, carnitas, deshebrada, tinga, cochinita… the list goes on.

Believe it or not, this has not sated our hunger for Mexican food, and I’ve taken to making my own carnitas so we can have taco nights at home every once in a while. It’s one of those incredibly simple, incredibly rewarding recipes that have you braise the meat for hours with no human intervention, until you have exceedingly tender meat that pulls apart into gloriously moist shreds and caramelized bits. (For a detailed discussion on the ins and outs of making carnitas, read this food lab piece.)

I’ve occasionally made my own corn tortillas (I actually own a tortilla press, that’s how committed I am) but for a quicker preparation, pliable lettuce leaves from a crisp head work beautifully. Place a few simple toppings on the table — finely diced onion, chopped cilantro, avocado slices, lime wedges — and you’re in business.

The recipe uses a whole pork shoulder, which you should get from a good butcher so it’s not pumped with antibiotics, and it makes quite a bit, but carnitas freeze well, so you can stash away any extra meat for a super easy dinner you’ll be grateful for sometime down the road.

Join the conversation!

Are you a fan of Mexican cuisine? Do you have a local taqueria you love? What’s your favorite Mexican recipe to make at home?

Pork Carnitas

Continue reading »

Homemade Coconut Milk Yogurt

On a quick trip to London a year and a half ago, I spent an embarrassing number of hours exploring the aisles of the Kensington Whole Foods, stocking up on amazing British bean-to-bar chocolate and the paleo granola that inspired my own.

In the dairy aisle I noticed with great curiosity that they sold coconut milk yogurt, and bought a small tub to have at breakfast the next morning — you know how I feel about hotel breakfasts. One spoonful and I was smitten: it had the smooth texture and lovely tang of dairy yogurt, but it was wonderfully aromatic, with that one-of-a-kind, subtle sweetness that coconut milk brings. You had to taste it to believe it.

Coconut milk yogurt had the smooth texture and lovely tang of dairy yogurt, but it is wonderfully aromatic, with that one-of-a-kind, subtle sweetness that coconut milk brings.

It was also fairly pricy (£2 for 125 g, that’s 2.80€ or 3$ for a half-cup, i.e. £16, 22.50€ or $25 for a liter/quart) and unavailable in France. So I resigned myself to see it as a once-in-a-blue-moon indulgence.

Until just a few of weeks ago, when I chanced upon this tutorial and saw the light: you can make your own coconut yogurt at home! From regular canned coconut milk! Available at the store!

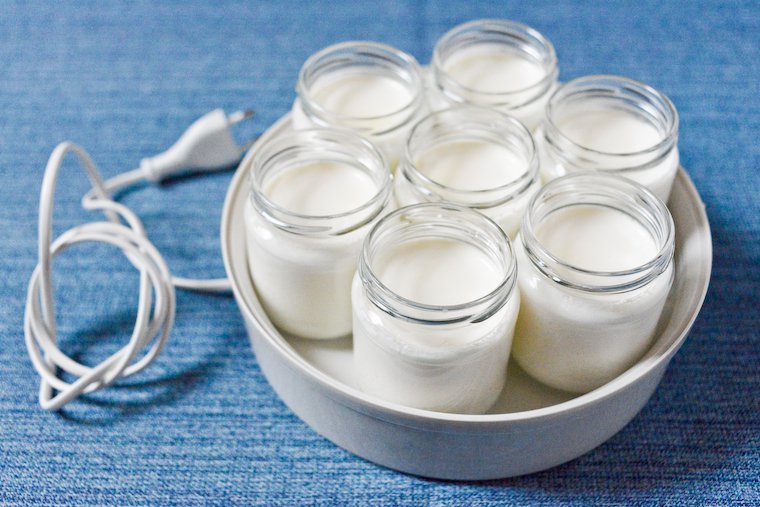
The process is just as easy as making ordinary yogurt from cow’s or goat’s milk, which I do weekly: you simply combine the coconut milk with yogurt ferment or a probiotic supplement, and leave it to incubate at a steady, moderate temperature (around 40°C or 105°F) until the coconut milk is cultured, which takes 24 hours for the level of tang I like.

And I’ve been loving my homemade coconut milk yogurt. It’s a treat in and of itself, but I love it with a sliced-up banana and some granola, or dotted with berries, and I think it would make an excellent base for frozen yogurt. The yogurt tends to separate slightly, with a thin layer at the bottom and another of set coconut oil at the top, but I just stir it all back together before eating.

To get a thicker, more set yogurt, I have also experimented with adding gelatin (the grass-fed beef kind) to the mix, and although it complicates the process a little — you have to heat up some of the coconut milk to dilute the gelatin, but you shouldn’t add the ferment to too hot a liquid or you’ll kill the microorganisms — I like the end result even better. I’ve outlined both formulas below. (And obviously, the addition of the gelatin means you can no longer call this vegetarian.)

From a price perspective, my coconut yogurt works out to about 15€ (£11 or $17) per litre/quart, which remains more expensive than making yogurt from animal milk, but is notably cheaper than store-bought coconut yogurt.

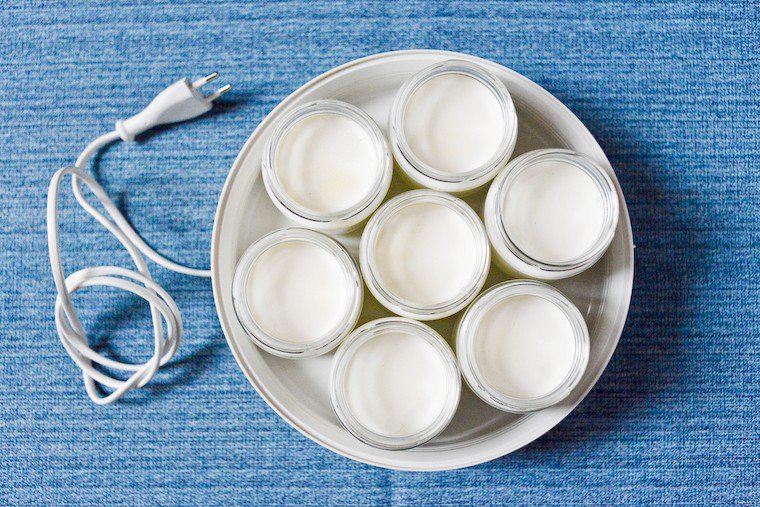
If you don’t have a yogurt maker, you can use the light inside your oven to generate the required heat (as outlined in the recipe below), but getting a yogurt maker is a small investment I promise you won’t regret. There is no need for anything fancy: I have a super basic model that doesn’t cost very much, and does the job perfectly. The one I own is equivalent to this model in the US, but if you live elsewhere, here are my criteria for choosing a yogurt maker:

  • Glass jars: the cocktail of plastic and heat is an ugly one, and because you’ll be reusing the jars again and again, you want them to be inert and heat-resistant, i.e. made out of glass.
  • No automatic shut-off: many models turn themselves off automatically after a few hours (6 to 8, depending on the model) because they consider that the yogurt is done after that time. However, you may like your yogurt tangier (incubated longer), or you may want to make 24-hour yogurt if you have trouble with lactose, or you may want to make coconut yogurt, which takes 24 hours also. I understand the convenience of the automatic shut-off, but I prefer to set an alarm for myself and keep control of the incubation duration. Conveniently, these manual models are also cheaper!
  • The possibility of getting extra jars: you definitely want a double load of jars right from the start, so you can begin a new batch of yogurt before you’ve eaten (and cleaned) your way through the previous one. Also, breakage happens (ahem).
  • There are single-container models that allow you to make the yogurt in bulk rather than in individual jars, but for my own use I find it much more convenient to have the yogurt pre-portioned and ready to grab in the fridge.

The coconut milk I use for these yogurt is one I buy at the organic store (the Organi brand) which costs 2.49€ per can, is 15% fat, and has no BPA in the inside lining (I’ve checked with the manufacturer). As for the ferment, I’ve successfully used this yogurt starter as well as this probiotic supplement, which has 7 billion probiotics (Lactobacillus, Bifidobacterium, Lactococcus, and Streptococcus strains) in each dose.

Join the conversation!

Do you make your own yogurt? What’s your prefered method? Have you ever tried it with non-dairy milk?

Coconut Milk Yogurt

Continue reading »

Get the newsletter

Receive FREE email updates with all the latest recipes, plus exclusive inspiration and Paris tips. You can also choose to be notified when a new post is published.

View the latest edition of the newsletter.