Tools & Utensils

The Sesame Mill

While in New York last month, Maxence and I had lunch at Ippudo, a ramen place that’s the first American outpost of a popular Japanese chain. The decor was super sleek and the ramen excellent, but what really got me excited was the sesame mill that was propped on our table, keeping the shôyu company.

It was a simple thing, really: a plastic see-through container filled with toasted sesame seeds, mounted with a red cranking wheel and an open mouth at the top. To work it, you flipped the mill upside down, you turned the wheel by its tiny handle and, with the most delicate scrunching sound, out came a sprinkle of golden flecks.

It was the first time I’d seen anything like this. It was red, it was adorable, it was Japanese; I had to have one.

We enquired whether the restaurant might sell one to us* but, however amused they seemed to be by this strange case of love at first grind, they said no. My heart lying in shards on the floor, I let Maxence pry the mill from my clenched fingers.

Continue reading »

The Elements of Cooking

If you keep an eye on my book list, you may have noticed I am currently reading Michael Ruhlman‘s recently published, orange book*. In The Elements of Cooking, he proposes to break down and discuss the building blocks of the cooking craft, like William Strunk Jr. and E.B. White did for writers in their classic little volume The Elements of Style, to which the title and format are a homage.

The Elements of Cooking It is an engaging and educational read that retains a strong sense of the author’s voice and idiosyncrasies, unlike other reference books like, say, The Food Lover’s Companion, which I consult regularly but wouldn’t think to read from cover to cover.

The bulk of the book consists in an Acid-to-Zester lexicon of concepts, techniques, preparations, and ingredients, which Ruhlman prefaces with a section in which he lays down his founding principles, addressing such themes as salt, heat, and finesse.

In his essay on tools, he begins by asking the reader to “imagine the kitchen as a white box with nothing more than a stove, fridge, countertop, and sink — not a single other element for cooking in it — and then to pose a hypothetical question: if you were asked to outfit the kitchen with as few items as possible, the absolute minimum you could possibly get away with and still be able to cook most things, what would those items be?”

This question is of particular interest to me as it conjoins two topics I find endlessly stimulating: the desert island question (if you could only bring along five books/CDs/articles of toiletry, what would they be?**) and the neverending battle one has to wage to keep one’s home and life clutter-free.

So I’d like to submit the question to you: if you could only have five tools (pots, utensils, cutlery, and let’s add appliances) in your kitchen, what would they be? Note that we are considering your cooking needs only, setting aside the question of baking equipment. (If you’re the playful type, I suggest you come up with your own list before scrolling down to see Ruhlman’s and mine.)

* The book was sent to me as a review copy.
** Great car game, too!

Continue reading »

Laguiole Pocket Knife

All right, I’m back! Technically, I have been back from my vacation for ten days, but as soon as I returned, I left again to be a witness at the wedding of two of my favorite people in the world, an honor and a duty that I took very seriously, although they ended up requiring very little work from me — the purchase of a pretty dress, the signing of a registry, and, at one point, the making of a salad dressing.

No sooner had I touched ground after the ceremony and assorted celebrations that I found myself aboard the Eurostar, whooshing my way to London for two booksigning events, a few nice meals, and an elating food shopping session at the new Kensington Whole Foods store, with the best food shopping companion one could hope for, one with the curiosity of a child and the stamina of a marathon runner.

It took me a few days to recover and attempt to catch up with three weeks of unanswered emails — the gods of the Internet are chuckling, presumably at the absurdity of such an ambition — but here I am now, ready to take over the world or, at the very least, refill the gaunt shelves of our fridge and start cooking anew.

And just like every child deserves cool gear to start a fresh school year, I have acquired a new little helper.

Please meet my Laguiole pocket knife!

Eleven centimeters* when folded, twenty when it stands at full height, it has a rosewood handle, a Swedish stainless steel blade, and a hand-forged, hand-etched spring adorned with the signature bee (some say it is a fly; I say feh). It is sharp, it is beautiful, and I haven’t been this knife-proud since my father bought me a tiny opinel when I was eight.

Laguiole Pocket Knife

Continue reading »

Kitchen Toolbox, Part III

Blades

[Looking for Part I and Part II?]

Sharp things

I am not a knife geek, so you won’t find any opinionated, my-knives-are-holier-than-thine talk here. The three simple pointers I can share are: 1- you should first and foremost choose knives that feel comfortable, hefty (but not heavy), and well-balanced in your hand, 2- a high price doesn’t necessarily equate a high performance (see edifying rating here), and 3- less is more. Here’s my basic kit:

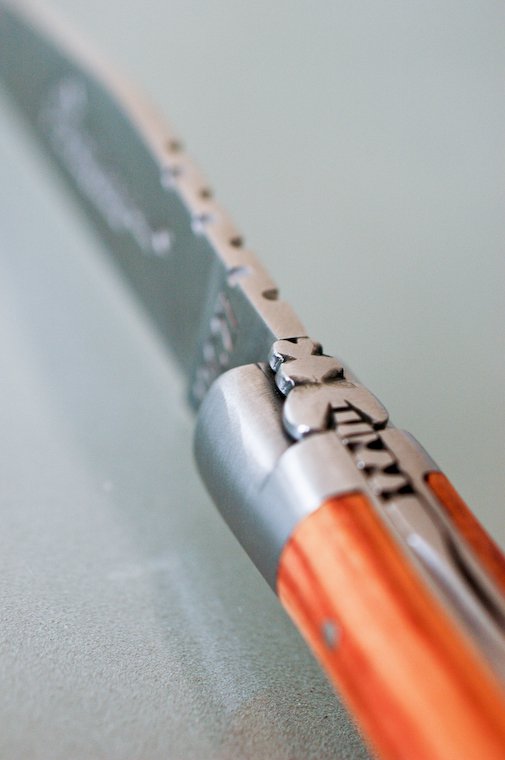
– A 20-cm/8-inch chef’s knife (couteau de chef), to cut, slice, mince, chop, and dice. My first was a stainless steel Dumas. Years later I won a Füri knife (with dimples on the blade) at a festival, and I’ve been quite happy with it ever since (although I wish the company hadn’t felt the need to get a celebrity chef endorsement; I find it mildly embarrassing).
– A 12-cm/4.5-inch paring knife (couteau d’office), for when the item to work on is small or handheld and more control is needed. I started with a basic one from Dehillerin‘s own line, until Maxence came home one day with a Wüsthof; we like it.
– A knife sharpener to keep these two knives happy. I use a diamond-shaped stone that looks like this one, bought at Dehillerin and used according to the salesguy’s instructions — I soak the stone in water first, set the knife at a 15° angle, and swish the blade away from me.
– A 25-cm/10-inch serrated bread knife to slice bread and cakes without making a horror movie scene out of them. Mine is, again, from Dehillerin’s line.
– A swivel-bladed vegetable peeler. I use it to peel vegetables (how very creative of me), but also to cut shavings of hard cheese or chocolate (chill the chocolate first). It is worth investing in one that has a good, sharp blade; I am very happy with my OXO peeler. It is in fact the second one I buy, since the first one disappeared one day: it either ran away with the lobster cracker or, more likely, I threw it in the trash along with the potato peels it had helped produce. Such is the saddening fate, I hear, of 90% of vegetable peelers throughout the world.
– A four-sided box grater, for cheese and vegetables; my favorite side (of course one has to have a favorite side) is the large hole one. Again, make sure it is sharp as a whip (I can recommend the Gefu brand), otherwise the merest carrot to grate will be such a hassle you will stop eating grated carrot salads and that would be a pity, wouldn’t it, because grated carrot salads are rather nice, not to mention good for your complexion.

Not indispensable but nice to have:

– A mandoline, to slice vegetables and fruit quickly and in thin, regular slices. It can also be used to cut matchsticks or crinkled slices, which is pretty neat, and chunks of your fingers, which is pretty painful (be careful with that thing). Depending on your budget, you can go all out and get a professional model (mine is a Bron) or buy a cheaper plastic one outside any Parisian department store: the latter may not have as long a life, but it will work acceptably well.
– A microplane zester to grate citrus zest, cheese, ginger, chocolate, etc. finely and effortlessly.

Continue reading »

Kitchen Toolbox, Part II

Kitchen Toolbox, Part II

[Part I can be found here.]

Utensils

– A slotted turner, to lift and turn food in the skillet or sauté pan. Choose a heat-resistant one made of silicone or nylon so it won’t scrape your pans.
– A pair of locking tongs, to grab, flip, and arrange food in the pan as precisely as if you were using your fingers, minus the burns.
Wooden spoons, to stir and mix. It’s nice to have at least two of these. Choose them with a long handle (about 30cm/12”) so your hand will be far from the heat source as you stir.
– A slotted spoon, to lift the solids from a pan and leave the liquids behind. Very handy to serve stews, too.
– A ladle, to transfer and serve soup.
– A heat-resistant silicone spatula, to scrape bowls to the last drop, and smooth out the surface of cake batters.
– A wire whisk.
– A set of measuring cups and spoons. I personally use the same set of cups to measure liquids and solids, and I am still alive.
– A nesting set of mixing bowls. Three is enough; don’t get tricked into buying one of those rainbow-colored sets of ten, however good-looking. Choose plastic or stainless steel; make sure they are stable and don’t tip over too easily. If you’re short on space, get glass or ceramic bowls attractive enough that they can also be used as salad bowls.
Cutting boards. Wood and plastic are both fine; I myself am partial to bamboo boards. (Note: to avoid cross-contamination, our friends the food safety experts say you should assign three different boards to work with produce, cooked products, and raw animal products.)
– A cooling rack, to speed up the cooling of baked goods so you can eat your cookies sooner.
– A fine-mesh sieve, to strain sauces and marinades. I use mine to sift the flour for cakes.
– A large colander, to drain pasta and set vegetables aside as you chop them.
– A salad spinner to dry your salad greens. It does a good job with fresh herbs, too, no real need to get the miniature one.
– A pepper mill. I love the one Meg gave me, which you operate with one push of the thumb (although, when the reservoir is full, my thumb is not quite strong enough).
– A can opener, preferably one that also has a little metal lip to open jars of jam (and, incidently, bottles of beer).
– A nut cracker. I use a simple yet sturdy vintage one that Maxence’s grandparents gave us.

Continue reading »

Get the newsletter

Receive FREE email updates with all the latest recipes, plus exclusive inspiration and Paris tips. You can also choose to be notified when a new post is published.

View the latest edition of the newsletter.