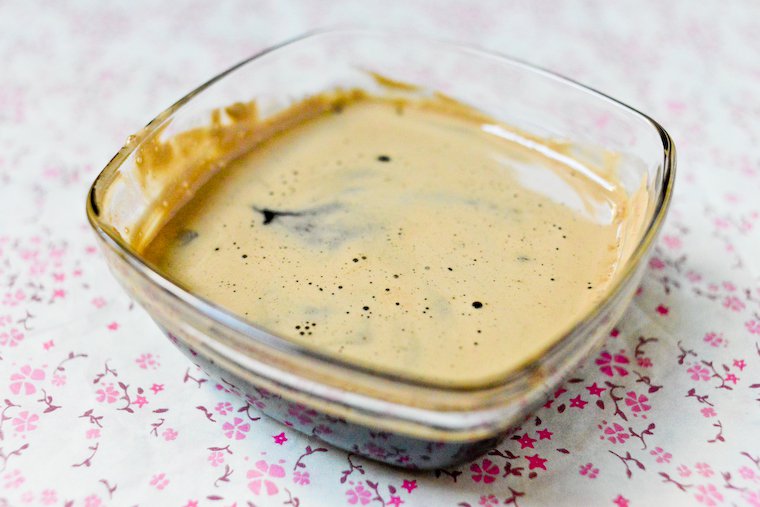
Black Sesame Panna Cotta

I have been enjoying Kaori Endo‘s food for years, from when she was cooking at Rose Bakery, to her charming book Une Japonaise à Paris (accessible, family-style Japanese cooking) and then to the opening of her wildly successful restaurant Nanashi*.

There she serves a short selection of dishes of Japanese inspiration, with three different bento-style meals — one with meat, one with fish, one vegetarian — that each feature a mix of whole grains, and three seasonal(ish) vegetable preparations combining the raw and the cooked.

It is all fresh and tasty and healthful — you can view pictures on their Facebook page — and it usually leaves a little bit of room for dessert, and that is a good thing because you don’t want to pass up Kaori Endo’s delicate creations.

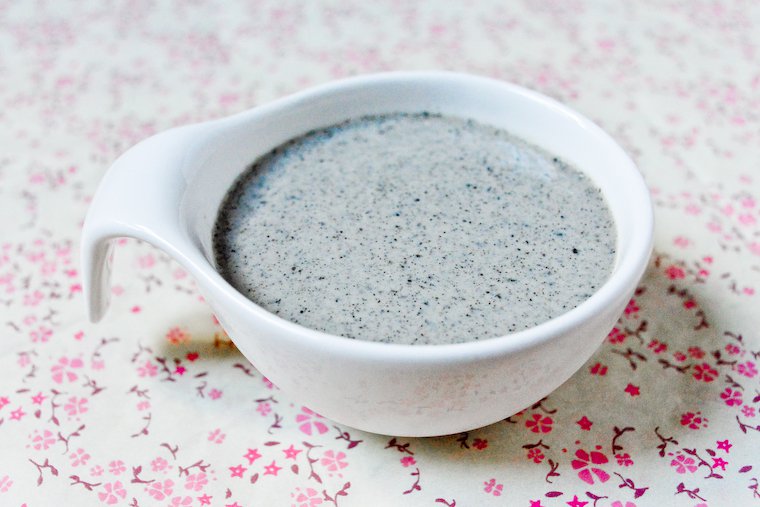
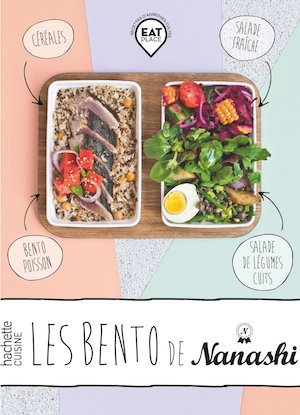
Les Bentos de Nanashi So when I received her freshly released book Les Bento de Nanashi, I was of course interested to read about her kakuni pork, her ponzu dressing, and her fried tofu with nori sauce, but I was also very happy to reach the dessert chapter and see that she had included a recipe for the restaurant’s black sesame panna cotta, which she credits to pastry cook Megumi Takehana.

You see, I had an open jar of black sesame paste in my fridge for which I’d been trying to find cool uses — including a delicious ice cream and a psyllium mochi I’ll write about sometime — and I knew this would be just the thing to showcase the uniquely irresistible, nutty notes of black sesame.

Besides, I was long overdue for a fresh batch of panna cotta (blast from the past: this strawberry panna cotta) after tiring of it when it became ubiquitous on restaurant menus ten years ago.

A few thoughts on this outstanding recipe:

  • The book recommends you make a muscovado syrup to serve with the panna cotta. I admit I wasn’t sure there was a point, but the complex and sap-like notes turn out to be the perfect complement to the black sesame flavor. You’ll have lots of syrup leftover, but it will keep forever in the fridge and you can put it to awesome use on plain yogurt or drizzled over a strawberry salad.
  • Once the panna cotta mixture is ready, the recipe has you cool it over an ice bath until slightly thickened. Although it doesn’t explain why — French cookbooks are notoriously laconic about those things — I suspect this allows the black sesame to remain suspended in the mixture, otherwise the sesame paste would separate and fall to the bottom. I am making a note of this technique, as it should also solve the maddening issue of vanilla seeds sinking to the bottom when you flavor rice pudding or tapioca pudding with real vanilla beans.
  • Look for roasted black sesame paste at natural foods stores and Japanese markets (kuro neri goma). Jean Hervé makes a fine one that is distributed at most organic stores in France. If you can’t find it, you can try the recipe with another, boldly flavored nut or seed butter, or you can grind your own toasted black sesame seeds using a high-speed blender.
  • I had leftover crème fraîche that needed using so I substituted it for about one third of the whipping cream. We loved the refreshing tang that brought, so I’ll consider it again next time. Yogurt would be lovely too.
Muscovado syrup to serve with the black sesame panna cotta.

Muscovado syrup to serve with the black sesame panna cotta.

Join the conversation!

Have you ever cooked with black sesame paste, and what are your favorite uses for it? And do you like to make panna cotta, or did you tire of it when it was all anyone would serve?

Continue reading »

Meal Planning Tips and Tricks

I never dreamed I would one day become a meal planner.

For years and years, planning meals sounded achingly dull to me, and also pointless: I just kept a well-stocked pantry and fridge, and spontaneity was my middle name. In truth, I did formulate a plan for the fresh stuff I bought, but it was a fluid, unwritten one that was often altered or nixed when something came up, or I changed my mind, or I was short on time, or we felt like eating out.

And then, I had a kid.

I stuck to the same non-system for months, until I eventually realized it was no longer working for me. Rather than enjoying the delicious freedom of improvised cooking, as I had since my early twenties, I was feeling stressed trying to find time for meal preparation between work and child, and worst of all frustrated that I always seemed to be in a rush, cooking basic things that required no forethought and gave me no sense of accomplishment.

My cook’s soul was shriveling up, and meal planning was the obvious solution. A few months later, I am a much happier and more serene cook. I don’t plan our meals in writing every week — sometimes the mental plan is enough for me to wing it — but doing so regularly enough has helped me regain a sense of peace and control in the kitchen.

FREE PRINTABLE: You can download the meal planner I use to work out our weekly menus!

Meal Planning Tips: How I Do It

First of all, I only plan for meals I take with Maxence — my lunches are either simply assembled at home or eaten out — and in my household, breakfasts, desserts, and snacks can be trusted to happen satisfyingly without the need for planning.

I draw up my meal plan on Mondays, after I uncover the contents of my weekly vegetable delivery, and I also take into account:

  • A quick inventory of pantry or freezer items that I feel like (or need) using, plus leftover ingredients or dishes from the previous week (say, a container of homemade stock, some pesto, a few scraps of dough…),
  • The current list of things I’m inspired to cook,
  • A rough schedule for the upcoming week, to know when we’ll be eating in or out or having guests over, on which nights I’ll have time to cook, etc.

I give it a think, look through my recipe collections online and offline, do some research as needed for extra information or inspiration, and come up with:

  • A list of dishes and the days on which I plan to cook them, factoring in leftovers nights and wildcard meals (see below), and outlining what part(s) of those menus should work for our two-year-old,
  • A list of advance prep steps that can or should be done the day before (cleaning vegetables, soaking chickpeas, mixing the dough for a pizza or quiche crust, taking an item out of the freezer to thaw…),
  • A shopping list of missing ingredients, with the days I’ll be needing them so I know when to go to which shop.

This gives me a clear picture of what I need to do and when, so I can squeeze prep steps wherever they most readily fit in my schedule.

Read on for more on the 9 benefits and 7 “Yes, buts” of meal planning.

Continue reading »

April Favorites

Photography by The Minimalist Baker. Reproduced with permission.

A few of my favorite finds and reads for April:

~ How to juice without a juicer (as illustrated above). I plan to try this and strain the pulp using one of my mesh produce bags.

~ Should you name your kid Mizuna, or maybe Sriracha?

~ Paris will soon get its very first micro-distillery.

~ I am honored to be included in this Gastro 30 list of thirty 30-somethings that make the French food scene.

~ Les Gueules cassées, a French initiative to distribute imperfectly shaped fruits and vegetables that would otherwise be thrown out.

~ The April/May issue of Vegetarian Times includes three recipes of mine for vegetable tagines: spicy eggplant and egg tagine, spring vegetable tagine, and sweet potato and pomegranate tagine.

~ This freegan restaurant in Paris recycles unsold produce from the Rungis central market.

~ I shared Paris insight and inspiration for Ten-Q Magazine.

~ The 30-million-euro project that could change the face of Paris for food enthusiasts.

~ The zero-waste restaurant, coming to you from Chicago, and the zero-packaging grocery store, coming to you (soon) from Berlin.

Buckwheat Speculoos Cookies

If you keep an eye on my Favorites of the Month posts, which naturally I recommend you do, you may remember me featuring some organic and gluten-free cookies made in Belgium by a small company named Generous: a friend had kindly refered them to me, and they had offered to send samples my way.

I was impressed by the delicate, sandy texture they managed to create for their sablés — not so easy with gluten-free baked goods — and I love that they chose to use buckwheat flour, and embrace its bold flavor.

The simpler-shaped cookies had just as much snap and flavor as their more ornate counterparts.

The buckwheat notes work especially well in their speculoos, an emblematic spice cookie that is typically baked in the north of France, Belgium, the Netherlands, and parts of Germany. But the popularity of the speculoos has vastly outgrown these borders, and it is hugely popular all over France now, where it is often slipped on the saucer of espresso cups in cafés and restaurants (and often much needed to make the acrid coffee palatable).

When I saw how quickly that sleeve of buckwheat speculoos was inhaled in my household, I was inspired to revisit my own speculoos recipe, substituting buckwheat flour for half of the wheat flour (and decreasing the amount of sugar a little bit while I was at it).

I also took this opportunity to use the special speculoos molds that friends of mine brought me back from Alsace some time ago: before speculoos became a year-round treat, they were traditionally made during the Advent and given seasonal shapes — in my case, a crane and a Saint-Nicholas figure — by pressing the dough into finely carved wooden molds.

Buckwheat Speculoos -- Dusted molds

I confess I was a little sceptical about these: how could the dough possibly take on such an intricate shape, unmold without tears, and bake without all the details getting fudged? But I was amazed to see that, with proper flouring and no leavening agent in the dough (which my recipe didn’t call for anyway) all three bases were covered effortlessly.

I was intent on using these pretty molds, especially as I thought it might amuse my two-year-old to nibble on an oiseau and a monsieur (it did), but once I’d convinced myself that it worked and that the cookies were pretty indeed, I reverted to the much quicker slice-and-bake method.

Luckily, these simpler-shaped cookies had just as much snap and flavor as their more ornate counterparts.

Speculoos are lovely with a cup of tea or coffee — dipping is allowed, and even encouraged — but they are also the perfect companions to a fruit salad, or a compote of stewed or roasted fruit. They are also the cookie crust component of choice for French bakers who want to make cheesecake — no graham crackers in supermarkets this side of the Atlantic — and they make a pretty spectacular ice cream, too.

Buckwheat Speculoos -- Molded, post-baking

Continue reading »

Baked Falafel

Baked Falafel

I am a big fan of falafel, and every once in a while I get a craving for a good falafel sandwich, either from our local Lebanese hole-in-the-wall, or from the ever-thronged l’As du Fallafel on rue des Rosiers.

Seduced by the idea of an easy, ready-made dinner item, I have on occasion bought falafel from the organic store, in little plastic trays of fifteen, and they were quite tasty. But they cost a small fortune — a little over 4€ ($5.5) for fifteen two-bite falafel — for something so cheap to produce, so I got it in my head to make my own baked falafel instead.

A more rewarding kitchen venture you’ll seldom encounter: the baked falafel turned out crisp and flavorful, and when assembled into pita sandwiches, they made for a wonderful treat of a weeknight dinner.

I certainly don’t object to fried foods on principle, but I do avoid frying anything in my own (open) kitchen, as I balk at the inherent prospect of scrubbing the stove, and having my entire apartment smell of hot grease. So frying wasn’t an option, but baking in the oven was.

Making baked falafel

As it turns out, making falafel couldn’t be easier: you’ll soak dried chickpeas overnight, then grind them with some onion, garlic, spices, and parsley if you like. You’ll shape this crumbly mixture into balls or patties, and fry or bake, as prefered.

I was also delighted that this gave me the perfect opportunity to use the grinder attachment a friend gave me for my KitchenAid mixer a few years ago, and which had been sitting untouched in one of my kitchen cabinets since then. But if that’s not part of your kitchen arsenal, fret not: a mixer or blender will do just fine.

And a more rewarding kitchen venture you’ll seldom encounter: the baked falafel turned out crisp and flavorful, and when assembled into pita sandwiches with my simple tahini sauce and lots of crudités, they made for a wonderful treat of a weeknight dinner.

And for the cost-conscious among us, I got forty falafel balls out of this recipe, at an (all-organic) ingredient cost of roughly 2€ ($2.75), which makes them out to be about five times cheaper than the store-bought option. Check my homemade hummus recipe for more chickpea money-saving tips.

Join the conversation!

Are you a falafel aficionado too? Who makes your favorite? And do you fry things at home, or do you leave it to the pros to do the frying and related scrubbing?

Falafel sandwich at L'As du Fallafel.

Falafel sandwich (pretty light!) at L’As du Fallafel.

Continue reading »

Get the newsletter

Receive FREE email updates with all the latest recipes, plus exclusive inspiration and Paris tips. You can also choose to be notified when a new post is published.

View the latest edition of the newsletter.