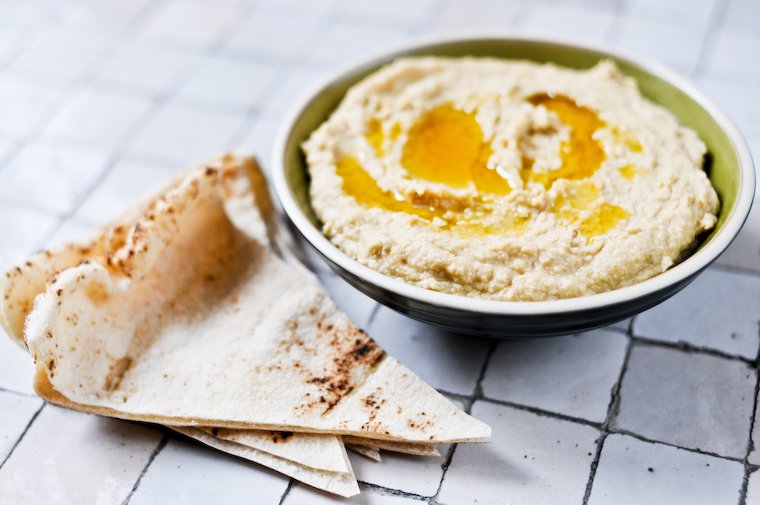
Hummus

I realize the world has not been holding its breath waiting for me to share my recipe for hummus.

But it does seem like the world, or at least a portion of its inhabitants, could use a friendly reminder about homemade hummus: how good it is, how easy, and how cheap, too.

Just out of curiosity, I’ve calculated the approximate cost of my hummus, which I make from dried chickpeas, and with organic ingredients, and I’ve worked out that it costs me under 2€ to produce the generous batch below. I’m not counting my time (maybe fifteen minutes of active work all in all), nor the electricity needed to cook the chickpeas on the stove and purée the hummus in the blender, but it adds up to roughly 3€/kg ($2/lb).

If you consume as much hummus as Natalie Portman and I do, it is worth calculating what that delicious habit is costing you.

Now, if you buy it at the supermarket, where it is most definitely not organic and a few non-pantry items creep uninvited into the ingredients list, it costs 13.50€/kg ($9/lb). And if you were to get it fresh from the Middle-Eastern deli in my neighborhood, because you have friends coming over for the apéro and you happen to be walking past the shop, you may pay up to — insert gasp here — 18.70€/kg ($12.50/lb). That’s over six times what it costs to make your own.

Your mileage may vary, and perhaps you live near a provider who sells an excellent hummus for less than that, but if you consume as much hummus as Natalie and I do, it is worth calculating what that delicious habit is costing you.

Naturally, the obstacle for most would-be hummus makers is the pre-soaking of the dried chickpeas, the long cooking time of legumes, yada yada yada.

To that I say: pshaw. 1- Just a few hours’ soaking is enough for chickpeas — I sometimes go as low as five or six and that’s plenty; 2- consider getting a pressure cooker and slash down the cooking time significantly; and 3- cooked chickpeas freeze perfectly, especially if they’re intended for puréed preparations such as this one, so make a double or triple batch and store the extra in the freezer for hummus-in-a-pinch later.

I’ve read here and there that some cooks peel their chickpeas for hummus, as in disrobe every single cooked chickpea from its translucent outer skin. This is a testament to their angelic meticulosity, I’m sure, and it is said to yield a smoother texture, but it robs you of some of the nutrients and fiber, too, so I’ve never bothered.

To conclude, I will note that I once tried making raw hummus, for which you soak the chickpeas, let them sprout for a few days, and then blend them with the rest of the ingredients as if they were cooked. I did not like it one bit.

Continue reading »

Chicken in a Bread Crust

The idea for this chicken in a bread crust came to me when I attended the Omnivore Food Festival in Deauville last week, a three-day event during which chefs from France and way beyond hop on stage and do live demos. This was the sixth edition and I’ve only missed one since it started, but this year was extra special for me because I’d been asked to host the pastry chefs’ demos in the sucré auditorium.

I had a blast meeting such talented individuals, from Bubo‘s Carles Mampel to Noma‘s Rosio Sanchez by way of the Ritz‘s Sébastien Serveau, and accompanying them through their demo so the audience got the most out of it.

One of the (many) perks of this job was that I got to hang out backstage in the salé auditorium when I didn’t have demos to present myself. And this is where I was when Sven Chartier, the young chef behind the Paris restaurant Saturne, started his presentation.

The chef was showing something he called la poulette des amis, a young hen from the Sarthe that he had cooked in a bread crust, nestled in Christophe Vasseur’s now-legendary Bread of Friends.

I was chatting with friends while keeping an eye on the monitor, and saw that Chartier was showing something he called la poulette des amis, a young hen from the Sarthe that he had cooked in a bread crust, nestled in Christophe Vasseur‘s now-legendary pain des amis (bread of friends).

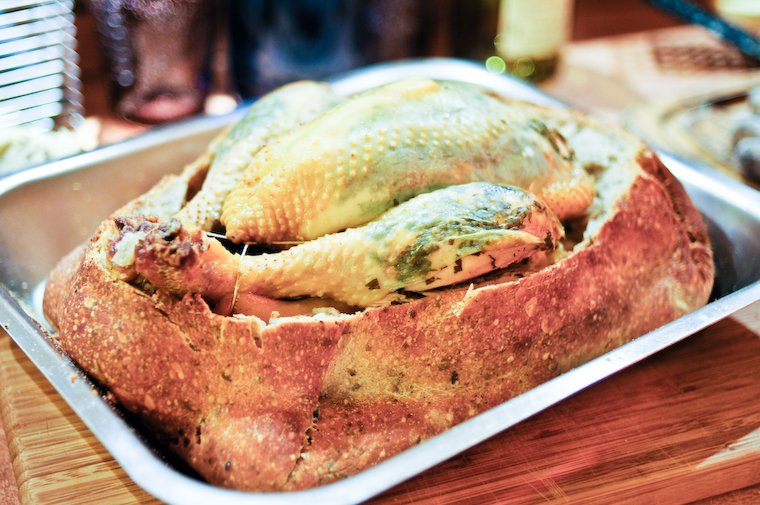
Chartier sliced the dark-brown crust open to reveal the chicken inside, and immediately two thoughts popped in my head: 1- chicken in a bread crust is like salt-crusted chicken, only 100% edible, and 2- someone’s got to get that chicken-juiced crust back in here.

That someone was me (I am nothing if not determined, so I walked out on stage after the demo and asked Chartier’s commis if there was a chance he might donate the crust in the name of culinary research) and our lucky little group happily tore samples from it.

I returned home with the idea of this chicken in a bread crust firmly lodged in the lobe of my brain I allocate to such vital matters. We happened to have friends over for dinner a few nights later, and the menu planning took a nanosecond: I was going to cook a bread-crusted chicken of my own, using a sourdough crust I’d make with my trusted starter Philémon (you guys have met, right?).

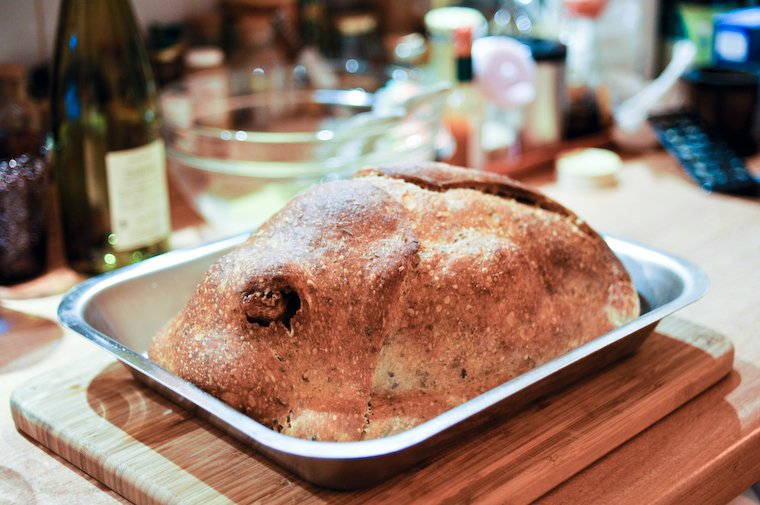
The overall method I used was merged from the ones I’ve already described for salt-crusted chicken (including the subcutaneous parsley) and pain au levain (with the addition of dried herbs for flavor). I found that the bread dough was easier to work with than the salt crust dough, because it is more elastic and therefore more docile.

I baked the chicken in a bread crust for an hour and a half, and the crust was nicely browned, but not too dark, when I sliced it open for carving. The skin of the chicken was less golden than with the salt crust, which I suspect is more porous, but plenty of juices had collected inside, and the chicken was just as moist and flavorful.

The very bottom of the bread crust, right where the chicken was sitting, wasn’t crisp enough for serving, but I cut the rest of the bread into big chunks to eat with the chicken, a wonderful treat that the salt crust method can’t quite compete with. And over the next couple of days, the leftovers of that crust were reheated in the oven and served with a grated carrot salad, and then alongside the stock I made with the chicken carcass.

Chicken in a bread crust

Continue reading »

Carrot Barley Galettes

For the past three years now, I’ve been writing a column in ELLE à table, a French bimonthly cooking magazine. This column spans two pages, and I generally devote one to an ingredient (cardamom! buckwheat! white chocolate!) and what you can do with it, the other to a food experience or trend (superfoods! Japanese pastries! mushroom picking!) and why you should care about it.

In the next installment (spoiler alert), due to appear in the March/April issue of the magazine, I’m declaring my passion for the rolled grainflocon de céréale in French — as a multi-faceted ingredient and an all-around trouper: cheap, nutritious, and versatile.

If the term “rolled grain” doesn’t ring a bell, just think of oatmeal: each of these little flakes is in fact an oat groat that was rolled between two tight cylinders to make it flat (ouch). In fact, when you look at a rolled grain closely, you can recognize the shape of the original grain, with the “seam” in the middle (I admit without shame that I realized this only recently). The same treatment can be, and is, applied to other unsuspecting grains: spelt, barley, rice, kamut, wheat, rye, you name it.

I am never without a bag or two or four of assorted flocons, and I use them in very many things, from granola to cookies, from bread dough to fruit crumbles, and from gratins to savory tarts.

And I’ve recently added a new type of preparation to the list of great things rolled grains and I can accomplish: please meet the carrot and barley galette, a vegan vegetable and grain patty that would love to meet you for lunch sometime.

All you need to do is combine rolled barley with grated carrots and a few seasoning ingredients, add water, wait for this mixture to swell and cohere, then shape into patties and cook in a skillet until crisp and golden with a tender heart.

I call it carrot and barley because, well, I’ve mostly made it with grated carrots and rolled barley, but naturally you can take the concept and run away with it (just don’t trip and fall on your face), using whatever grain and vegetable you like.

It works especially well with root vegetables (I’ve made a beet and spelt variation for instance), but nobody says you can’t try it with finely minced winter greens, grated Hokkaido squash, chopped mushrooms, or, come warmer days, with peas and later zucchini or tomatoes (in that case, you’ll have to adjust the amount of water to account for the juices). The one thing to remember is that said vegetable won’t really have time to cook in the skillet, so you’ll have to decide whether it needs to be cooked beforehand, or can be eaten semi-raw.

Continue reading »

Dukkah (Egyptian Spice Mix)

I first learned about dukkah three years ago, when I had the incredible good fortune of traveling to Australia for a writers’ festival. I spotted that Egyptian mix of nuts and spices again and again, in fine foods stores and on restaurant menus, and naturally, I was intrigued.

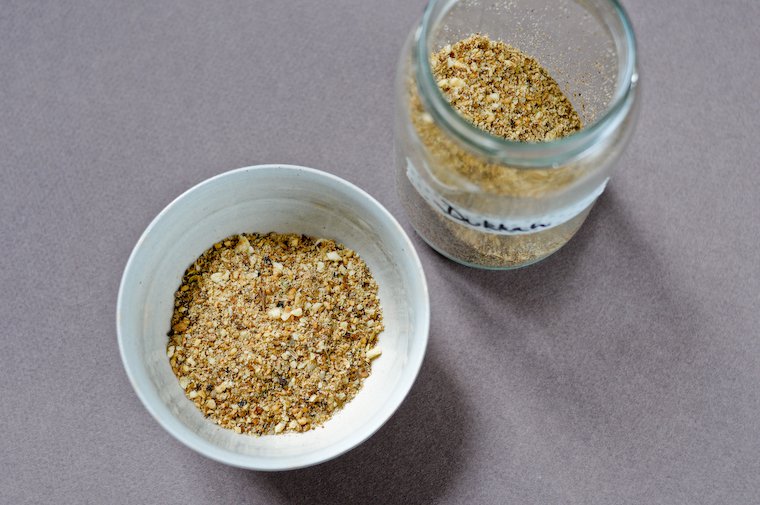
Dukkah — also spelled duqqa or dukka — is made with nuts (most commonly hazelnuts, sometimes pistachios or almonds) and seeds (cumin, sesame, coriander, fennel), as well as pepper berries, salt, and sometimes dried herbs and chili pepper. The ingredients are lightly toasted, then ground together into a not-too-fine powder.

Dukkah is typically used as an interactive appetizer involving bread, a shallow cup of olive oil, and another of dukkah: you tear off a piece of bread, dip it lightly in the oil, then in the dukkah, and eat. It is very good.

I brought a jar of dukkah back from Australia then, but quickly realized nothing was stopping me from making my own, which I enthusiastically did. My enthusiasm was somewhat tempered, however, by the fact that I was using a mortar and pestle. Traditional though they may be, these tools require a not insignificant amount of huile de coude (yes, the French use extra-virgin elbow oil, it has more flavor than elbow grease).

You tear off a piece of bread, dip it lightly in the oil, then in the dukkah, and eat. It is very good.

But my dukkaphilia was rekindled when I acquired an electric spice grinder last year — actually, it’s a repurposed coffee grinder — and discovered I could have freshly mixed dukkah in seconds, with very little caloric expenditure.

I’ve been making it a lot lately, and it’s my new favorite boy-this-just-goes-with-everything-doesn’t-it ingredient. In fact, I’m still looking for things I can’t do with it.

In addition to the classic bread-oil-dip use described above, I’ve been adding it to roasted vegetables and grated carrot salads, I’ve been seasoning hard-boiled eggs with it (dip and bite, dip and bite) and using it as a furikake to make onigiri (it works really well), and I’ve flavored the dough for bread rolls with it. Maxence likes to sprinkle it on a slice of buttered pain au levain at breakfast, and now that the first radishes are making their appearance (they are! isn’t it exciting?), I plan to substitute dukkah for the salt in croque-au-sel radishes.

There is no single formula for dukkah; it is one of those preparations for which there may be as many versions as there are cooks. I’m giving you the recipe below as an illustration of what works for me, but you can play around with the different ingredients to find the balance of flavors that appeals to you the most. (And when you do, I hope you’ll report back and share.)

Continue reading »

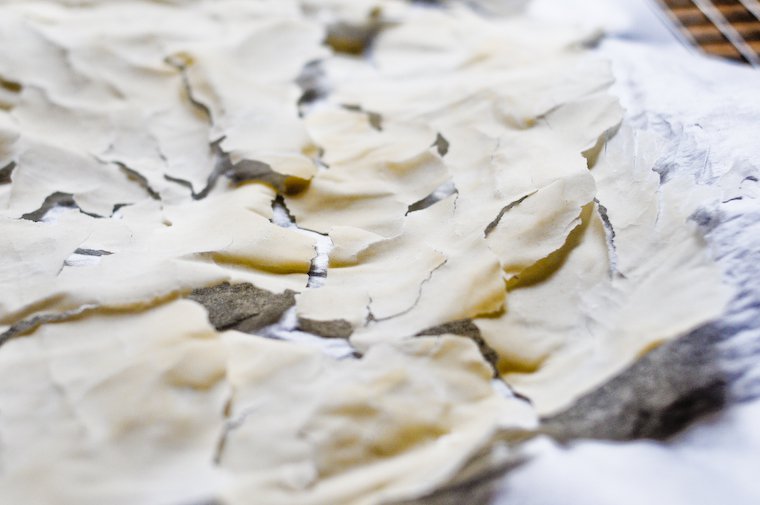
Dehydrating Your Sourdough Starter

When people get curious about baking with a sourdough starter and I explain how it works, I can tell they are a little freaked out by this idea of keeping the culture alive, day in, day out, for ever and ever.

“This is too much responsibility,” they say, followed by variations on “This is why I don’t have kids!” or “Houseplants all die under my care!” and “What about my trip to Marrakech?”

I understand the sentiment, so I’m always quick to point out that a sourdough starter can be kept in the fridge for a little while without the skies caving in, and that if “a little while” becomes “indefinitely”, you can always dehydrate the precious blob into a dormant matter that won’t require regular attention.

This is a handy procedure if you’re about to go through a period of time when you won’t be able to care for it consistently or bake with it, but also if you’d like to share your sourdough culture with a friend who lives far away, and also if you’re smart and want a backup copy to restore in the event that your live starter has a disk failure (i.e. dies).

It’s very easy, and requires no special equipment.

Continue reading »

Get the newsletter

Receive FREE email updates with all the latest recipes, plus exclusive inspiration and Paris tips. You can also choose to be notified when a new post is published.

View the latest edition of the newsletter.